Would you like to save this?
Pie Crust Recipe Without Shortening (Flaky, Buttery & Foolproof)
If you’ve been hunting for a Pie Crust Recipe Without Shortening that’s flaky, buttery, and easy enough for a weeknight pie, you’re in exactly the right kitchen.
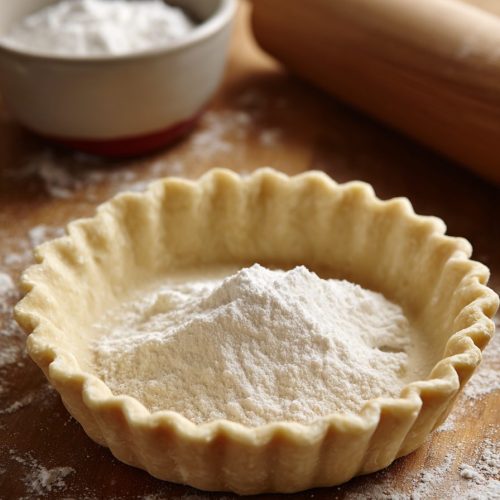
This is my go-to pie crust recipe—an all-butter, no shortening pie crust that bakes up tender, crisp around the edges, and sturdy enough to hold juicy fruit fillings. It’s an old-fashioned, homemade pie crust no shortening style, but with a few modern tricks that make it very forgiving, even if you’re brand-new to pie dough.
Why This Pie Crust Without Shortening Has My Whole Heart
I’ve been baking pies for over 30 years now—through toddlers tugging on my apron, teenagers raiding the fridge, and more Thanksgiving dinners than I can count. For a long time, I used shortening because that’s what my mom did.
But somewhere around my late 30s, I started shifting to butter pie crust recipes, skipping the shortening and focusing on flavor. I wanted that rich, bakery-style taste you get when you walk past a good pie shop, plus a simpler ingredient list.
This pie crust recipe without shortening is:
- Made with 100% real butter (no mystery fats)
- Flaky enough to shatter slightly when you cut into it
- Simple, with basic pantry ingredients
- Easy to roll out without falling apart (as long as you chill it)
- Versatile—it works for sweet and savory pies
- Friendly for beginners but still good enough for picky grandmas
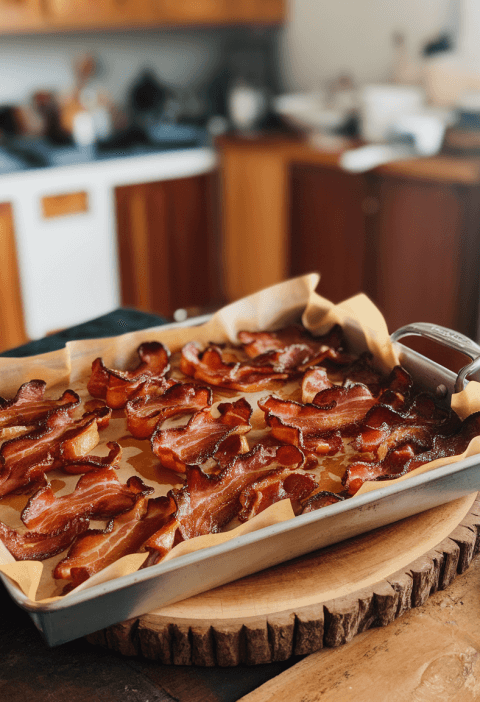
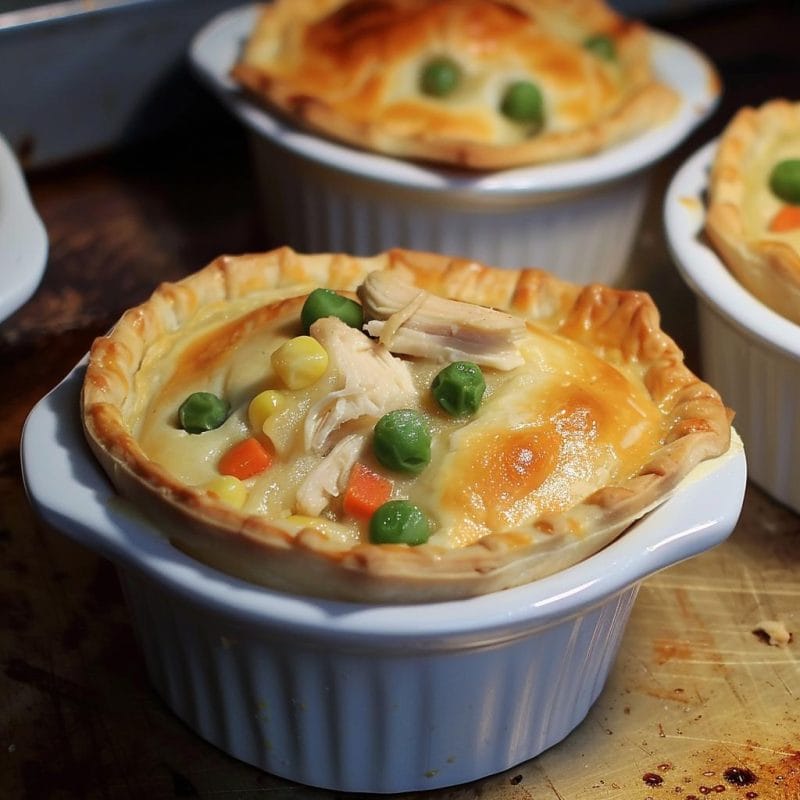
I love this crust especially for: apple pie in the fall, blueberry pie in the summer, and a classic Chicken pot pie when it’s cold and dark at 4:30 p.m. and we’re all pretending we like winter.
And if you’re trying to avoid shortening for health reasons, flavor preferences, or just because you don’t keep it in the house, this flaky pie crust without shortening will absolutely get the job done.
Why You’ll Love This Pie Crust Recipe Without Shortening
- All butter, no shortening – Deep, rich flavor and no waxy aftertaste.
- Beginner-friendly – Clear steps and visual cues; if you can stir and press, you can make this.
- Flaky texture – Those visible butter pieces turn into crisp, tender layers in the oven.
- Short, simple ingredient list – Flour, butter, salt, sugar, and a little water. That’s it.
- Ready for sweet or savory pies – Skip the sugar for quiche or pot pie; keep it for desserts.
- Freezer-friendly – Make the dough ahead and stash it for busy days or holidays.
- No fancy tools required – A bowl, a fork or pastry cutter, and a rolling pin (or wine bottle in a pinch).
- Easy to customize – Whole wheat, gluten-free flour blends, or herbs can all be swapped in with a few tweaks.
- Consistent results – Built around temperature control and moisture balance, not guesswork.
Ingredients for the Best All Butter Pie Crust (No Shortening)
This recipe makes one 9-inch pie crust (bottom only). For a double crust pie, simply double the recipe.
-
1 ¼ cups (150 g) all-purpose flour
Use a standard unbleached AP flour like King Arthur or Gold Medal. Spoon it into the measuring cup, then level, so you don’t pack in too much. -
½ teaspoon fine sea salt
Regular table salt works, but reduce to ⅜ teaspoon if it’s very fine. Salt balances the butter and brings out the flavor of the crust. -
1 tablespoon granulated sugar (optional, but recommended for sweet pies)
This doesn’t make the crust “sweet” so much as gently flavorful. For savory pies, you can cut this down to 1 teaspoon or leave it out. -
8 tablespoons (1 stick / 113 g) unsalted butter, cold
Use high-quality butter if you can—Kerrygold, Plugrá, or your favorite store brand. The butter needs to be very cold, straight from the fridge. If your kitchen is warm, you can even pop it in the freezer for 10 minutes first. -
3–5 tablespoons ice-cold water
Fill a small cup with water and ice cubes. Measure from that as you go. This is key to keeping the dough cold and preventing a tough crust.
Optional but helpful:
- ½ teaspoon vinegar or lemon juice (mixed into the water)
This can help slightly tenderize the dough and delay gluten development. It’s not mandatory, but I like it, especially for beginner bakers.
You know what? That’s the beauty here—everything is ordinary, recognizable, grocery-store stuff. No shortening, no weird fats; just a classic all butter pie crust made from staples you probably already have.
Step-by-Step Directions: Easy Pie Crust Without Shortening

1. Chill your ingredients (and yourself)
Place your butter in the fridge (or 10 minutes in the freezer) while you gather the other ingredients.
Add a few ice cubes to a cup of water and set it aside.
Tip: A cool kitchen makes a better pie dough without shortening. If it’s hot, try working near a window or earlier in the day.
2. Mix the dry ingredients
In a medium mixing bowl, whisk together:
- 1 ¼ cups flour
- ½ teaspoon salt
- 1 tablespoon sugar (if using)
Whisking combines everything evenly and gives you a light, fluffy base for your simple pie crust recipe without shortening.
3. Cut in the butter
Cut the cold butter into small cubes (about ½-inch). Toss them in the flour mixture.
Using a pastry cutter, two knives, or your fingertips, work the butter into the flour until you see:
- Some pieces the size of peas
- Some smaller, like coarse crumbs
You should still see lots of visible butter bits—that’s what makes a flaky no shortening pie crust. If you work the butter until it disappears completely, you’ll lose that layered texture.
Warm-hands tip: If your hands run hot, switch back to a fork or pastry cutter when the butter starts to feel soft, and pop the bowl into the fridge for 5 minutes.
4. Add the ice water, slowly
Sprinkle 3 tablespoons of ice water over the flour-butter mixture.
Using a fork, gently toss and press the mixture together. Don’t stir aggressively—just lift and fold, letting the water moisten the flour.
Check the dough:
- If it still looks very dry and sandy, add another 1 tablespoon of ice water.
- Press a small handful of dough together; if it holds when you squeeze but still looks a little shaggy, you’re there.
- If it crumbles apart, add up to 1 more tablespoon water, just a teaspoon at a time.
You want the dough to barely hold together, not feel like cookie dough. Overly wet dough is harder to handle and can bake up tough.
5. Bring it together and chill
Turn the mixture out onto a clean countertop or a sheet of parchment.
With your hands, gently press and gather the dough into a ball, then flatten it into a disc about 1-inch thick. If there are dry bits, press them into the disc; resist the urge to knead.
Wrap the disc tightly in plastic wrap or a reusable beeswax wrap.
Refrigerate for at least 1 hour (and up to 3 days). This resting time:
- Hydrates the flour
- Firms up the butter
- Relaxes the gluten, so your crust won’t shrink as much
This is the “secret” to consistently good flaky pie crust without shortening—chill time is non-negotiable.
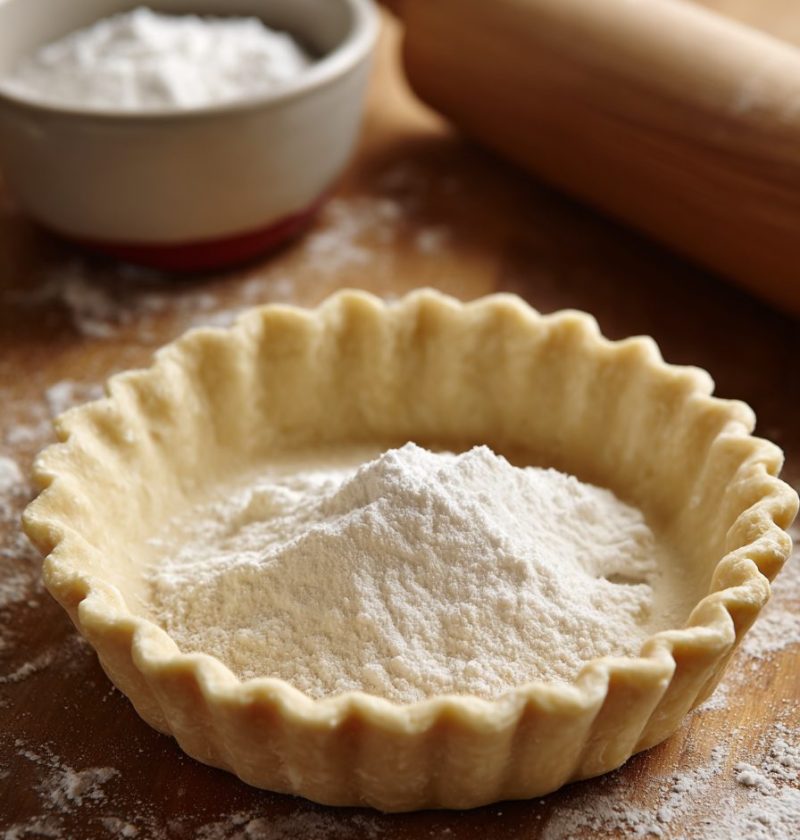
6. Roll out the dough
Lightly flour your counter and rolling pin.
Place the chilled dough disc in the center. Let it sit at room temperature for 3–5 minutes if it’s rock hard.
Roll from the center outward, turning the dough a quarter-turn after every couple of rolls. Lightly dust under the dough and on top as needed, but don’t go crazy with the flour.
Roll until you have a circle about 12 inches in diameter and roughly ⅛-inch thick for a standard 9-inch pie dish.
If the edges crack, just patch and gently press them back together. Pie dough is more forgiving than it looks.
7. Fit into the pie dish
Carefully roll the dough loosely around your rolling pin, then unroll it over your pie plate. Or you can gently fold it into quarters and place it, then unfold.
Ease the dough into the bottom and sides of the dish—don’t stretch it, or it’ll shrink back in the oven.
Trim excess dough so you have about a 1-inch overhang. Fold that under itself along the rim to create a thicker edge. Crimp with your fingers or press with a fork for a simple finish.
At this point, you have two options, depending on your recipe:
-
For a pre-baked (blind baked) crust – like for cream pies or custards:
- Chill the crust in the fridge for 20–30 minutes.
- Line with parchment and fill with pie weights or dried beans.
- Bake at 375°F (190°C) for 15–20 minutes, then remove weights and bake until golden.
-
For a filled pie – like apple or chicken pot pie:
- Add your filling to the unbaked crust.
- If using a top crust, add it now, then chill the assembled pie for 15 minutes before baking.
8. Bake according to your pie recipe
Because fillings vary, follow the baking temperature and time recommended in your pie recipe. Most pies bake between 375°F and 425°F.
Your butter pie crust recipe is ready when:
- The edges are deep golden brown
- The bottom looks set and lightly golden (check with a peek if possible)
Let the pie cool on a rack so the crust finishes setting and doesn’t go soggy.
Servings & Timing
- Yield: One 9-inch single pie crust (bottom only)
- Prep Time: 15–20 minutes (mixing and rolling)
- Chill Time: At least 1 hour (up to 3 days)
- Total Time: About 1 hour 20 minutes, plus baking time for your specific pie
For holidays, I usually make two or three batches of this easy pie crust without shortening at once, then keep the discs in the fridge or freezer so the “hard part” is already done.
Fun Variations on This No Shortening Pie Dough
You can absolutely play with this basic pie dough without shortening and make it your own:
- Savory Herb Crust – Skip the sugar and add 1–2 teaspoons chopped fresh rosemary, thyme, or sage for quiche or pot pie.
- Whole Wheat Blend – Replace ⅓ of the all-purpose flour with whole wheat flour for a slightly nutty, rustic crust.
- Cheddar Crust – Stir in ½ cup finely shredded sharp cheddar with the dry ingredients; perfect for apple pie or tomato pie.
- Cinnamon Sugar Dessert Crust – Add ½ teaspoon ground cinnamon to the dry mix and sprinkle the rolled-out crust with a bit of cinnamon sugar before filling.
- Gluten-Free Version – Use a 1:1 gluten-free baking flour blend and add ½ teaspoon xanthan gum if your mix doesn’t include it; add water gradually, as GF flours absorb differently.
- Brown Sugar Twist – Swap the granulated sugar for light brown sugar for a deeper, almost caramel note in sweet pies.
Storage, Freezing & Make-Ahead Tips
One of the reasons this homemade pie crust no shortening is a staple in my kitchen is that it’s incredibly make-ahead friendly.
In the fridge (unbaked dough):
- Store the wrapped dough disc in the fridge for up to 3 days.
- If it feels too firm to roll, let it sit on the counter for 5–10 minutes.
In the freezer (unbaked dough):
- Wrap the disc well in plastic, then in a freezer bag.
- Freeze for up to 3 months.
- Thaw overnight in the fridge before rolling.
Baked crusts:
- A fully baked pie crust can be cooled, wrapped, and stored at room temperature for 1 day, or in the fridge up to 3–4 days.
- For longer storage, freeze the baked crust (well-wrapped) for up to 2 months. Thaw uncovered at room temperature.
Reheating / crisping:
- If your baked crust loses a little crispness, pop it into a 350°F oven for 5–8 minutes to freshen and re-crisp before filling or serving.
Notes From My Kitchen (Little Things That Matter)
-
Cold is everything. The main difference between a sad, dense crust and a flaky one is how cold the butter and dough stay before baking. If the dough starts to feel greasy or soft, just pause and chill it.
-
Don’t stress about perfection. Those “ugly” pies? They almost always taste the best. A slightly ragged edge or patchwork crust still bakes into something beautiful and homemade.
-
Flour balance. If your dough cracks a lot, it may be a touch dry; next time, add another teaspoon or two of water. If it’s sticky and hard to work with, you may have added a bit too much water—use more flour on your surface and add slightly less next time.
-
Trust visual cues, not just numbers. Humidity, flour brand, even how you measure—these all affect how much water you need. That’s why I always say “3–5 tablespoons.”
-
Practice on a “no-pressure” day. Don’t wait for Thanksgiving to try a new crust. Make a practice pie some random Tuesday. Worst case, you end up with extra pie. Nobody complains about that.
Frequently Asked Questions About Pie Crust Without Shortening
1. Can I use salted butter instead of unsalted?
Yes, you can. Just reduce the added salt to about ¼ teaspoon and maybe taste a small bit of baked edge next time to adjust.
2. Why is my pie crust tough instead of flaky?
Usually, it’s from adding too much water or overworking the dough. Next time, stop mixing as soon as it holds together and use gentle pressure instead of kneading.
3. My dough keeps cracking when I roll it—what am I doing wrong?
Cracking usually means the dough is too cold or a bit dry. Let it warm up for a couple of minutes and, if needed, very lightly mist it with water and press it back together.
4. Can I make this pie crust recipe in a food processor?
Yes, but pulse very briefly. Over-processing can heat the butter and create a less flaky texture. I like to process the flour and butter, then stir in the water by hand.
5. How do I prevent a soggy bottom crust?
Bake on the lower third of your oven, use a glass or metal pie pan, and consider blind-baking the crust for juicy fruit or custard pies.
6. Can I use this crust for a double-crust pie?
Absolutely—just double the ingredients and split the dough into two discs. Chill both, roll one for the bottom and one for the top.
7. Is this crust good for savory pies like quiche or pot pie?
Yes! Just skip (or greatly reduce) the sugar and you’ve got a perfect base for savory fillings.
8. Can I use this for a galette instead of a traditional pie?
Yes, it works wonderfully for rustic galettes. Roll it out, pile the filling in the center, and fold the edges over.
Wrapping It Up (And Serving a Slice)
This Pie Crust Recipe Without Shortening is the kind of recipe I wish someone had handed me when I first started baking—simple ingredients, clear steps, and flexible enough to meet you wherever you are in your pie-making journey.
If you’ve been nervous about pie dough, I hope this easy pie crust without shortening gives you the nudge to try. Bake it, taste it, adjust it to your liking, and make it part of your family’s holiday (and Tuesday night) traditions.
When you try this all butter pie crust, come back and tell me how it went—what filling you used, what you tweaked, what your family said. And if you’re ready for more, you might like experimenting next with a classic apple pie, a summer berry galette, or a cozy chicken pot pie using this same crust as your base.
Pie Crust Recipe Without Shortening (Flaky, Buttery & Foolproof)
Ingredients
- 1 1/4 cups all-purpose flour about 150 g; spooned and leveled
- 1/2 teaspoon fine sea salt or 3/8 teaspoon very fine table salt
- 1 tablespoon granulated sugar optional; recommended for sweet pies
- 8 tablespoons unsalted butter 1 stick / 113 g; very cold, cut into 1/2-inch cubes
- 3 tablespoons ice-cold water plus up to 2 tablespoons more as needed
- 1/2 teaspoon vinegar or lemon juice optional; mix into the water to help tenderize the dough
Instructions
- Place the butter in the refrigerator (or freezer for 10 minutes) so it is very cold. Fill a small cup with cold water and a few ice cubes; let it sit while you prepare the dry ingredients. If using vinegar or lemon juice, add it to this water.8 tablespoons unsalted butter, 3 tablespoons ice-cold water, 1/2 teaspoon vinegar or lemon juice
- In a medium mixing bowl, whisk together the flour, salt, and sugar (if using) until evenly combined and slightly aerated.1 1/4 cups all-purpose flour, 1/2 teaspoon fine sea salt, 1 tablespoon granulated sugar
- Add the cold, cubed butter to the flour mixture. Using a pastry cutter, two knives, or your fingertips, cut or rub the butter into the flour until you have a mixture with some pea-sized pieces and some smaller, coarse-crumb pieces. You should still see visible bits of butter—do not work it until the butter disappears.1 1/4 cups all-purpose flour, 8 tablespoons unsalted butter
- Sprinkle 3 tablespoons of ice-cold water over the flour-butter mixture. Using a fork, gently toss and fold the mixture to moisten it without mashing. Squeeze a small handful of dough: if it holds together and still looks shaggy, it’s ready. If it crumbles apart and looks dry, add up to 2 more tablespoons of ice water, a teaspoon at a time, just until the dough barely comes together. It should not feel wet or like cookie dough.3 tablespoons ice-cold water
- Turn the shaggy mixture out onto a clean countertop or sheet of parchment. Using your hands, gently press and gather it into a ball, incorporating any dry bits, but avoid kneading. Flatten into a disc about 1 inch thick. Wrap the disc tightly in plastic wrap or reusable wrap and refrigerate for at least 1 hour and up to 3 days to hydrate the flour, firm the butter, and relax the gluten.
- Lightly flour your work surface and rolling pin. Place the chilled dough disc in the center. If it is very firm, let it rest at room temperature for 3–5 minutes. Roll from the center outward, turning the dough a quarter turn every few rolls and lightly dusting with flour as needed to prevent sticking. Roll into a 12-inch circle about 1/8 inch thick for a standard 9-inch pie dish. Patch and gently press together any cracks at the edges.
- Carefully roll the dough loosely around the rolling pin or fold it into quarters, then transfer and unroll or unfold it into a 9-inch pie dish. Ease the dough into the bottom and up the sides without stretching. Trim so there is about a 1-inch overhang, fold the overhang under itself along the rim to create a thicker edge, and crimp with your fingers or press with a fork.
- For pies that require a pre-baked crust (such as cream pies or some custard pies), chill the shaped crust in the refrigerator for 20–30 minutes. Heat the oven to 375°F (190°C). Line the chilled crust with parchment paper and fill with pie weights or dried beans. Bake for 15–20 minutes, then carefully remove the parchment and weights and continue baking until the bottom looks set and the crust is golden. Cool before filling.
- For pies such as apple pie or chicken pot pie, add your prepared filling to the unbaked crust. If using a top crust, place it over the filling, seal and crimp edges, and cut vents as needed. Chill the assembled pie for about 15 minutes before baking, then bake according to your filling recipe, usually between 375°F and 425°F, until the crust is deep golden and the bottom is set.