Would you like to save this?
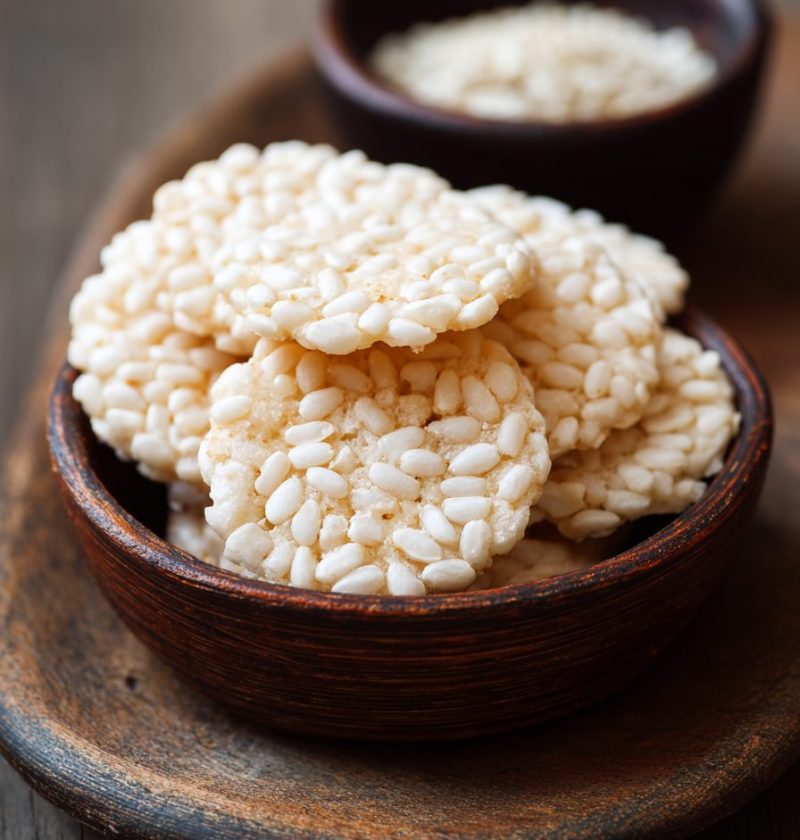
Rice Cracker Recipe (Easy, Crispy & Perfect for Snacking)
If you’ve been craving a light, Crunchy, and healthier snack, this Rice Cracker Recipe is your new pantry staple—crisp, golden, and incredibly simple, with big Japanese-inspired flavor and no deep frying.
What Makes This Rice Cracker Recipe So Special?
These homemade rice crackers are my answer to those afternoons when I want “just a little something” that doesn’t feel heavy or loaded with mystery ingredients. Think of them as a cross between Japanese rice crackers (senbei) and the better-for-you baked snacks we all wish came in bigger bags.
We’re talking baked rice crackers, not fried, so they’re naturally lighter. Because they’re made with rice flour, they can easily be gluten free rice crackers (I’ll show you how) and the flavor is customizable—savory, spicy, or even a tiny bit sweet.
I started making these a few years ago when my kids were bringing home those little packs of crunchy rice snacks from the Asian market. Delicious, but pricey. One weekend, my husband looked at me and said, “You could totally make these.” Challenge accepted.
Now this easy rice cracker recipe is something I pull out for:
- Movie nights
- Cheese boards when friends come over
- Lunchbox snacks
- “I need something crunchy but not potato chips” evenings
And honestly, they’re fun to make—like savory little cookies.
Why You’ll Love This Rice Cracker Recipe
- Crispy and crunchy, not greasy
- Baked, not fried, so lighter and home-kitchen friendly
- Naturally gluten-friendly (made with rice flour—no wheat needed)
- Customizable flavors: soy, sesame, spicy, cheesy… you name it
- Simple pantry ingredients—nothing fancy or hard to find
- Great for meal prep and snacking all week
- Kid-friendly but interesting enough for adults
- Pairs beautifully with cheese, dips, or just a cup of green tea
- Holds up well in storage—stays crunchy for days
- A fun “weekend project” recipe that’s still easy enough for beginners
Ingredients for Crispy Homemade Rice Crackers
Here’s what you’ll need to make this crunchy rice snack. I’ll give you plenty of substitution ideas as we go, so use what you’ve got.
-
1 ½ cups (180 g) White rice flour
- Use regular rice flour, not sweet/glutinous rice flour. If you’re gluten sensitive, look for a certified gluten free rice flour (Bob’s Red Mill works well).
-
½ cup (60 g) brown rice flour
- This adds a toasty, nutty note and better crunch. If you don’t have brown rice flour, you can use all white rice flour (total 2 cups).
-
2 tbsp cornstarch or potato starch
- Helps with that snappy, crispy texture. Potato starch gives an extra firm crunch, cornstarch is a bit lighter—both work.
-
½ tsp fine sea salt, plus more for sprinkling
- Use fine salt in the dough so it distributes evenly.
-
2 tsp sugar
- Just a little. This doesn’t make them sweet; it balances the salt and soy sauce.
-
3 tbsp neutral oil (like grapeseed, canola, or avocado)
- You want a neutral oil so the savory flavors shine. Sesame oil is too strong on its own here, but we’ll add a bit later for flavor.
-
2–3 tbsp low-sodium soy sauce or tamari
- This gives that classic Japanese rice cracker flavor. Use tamari for gluten free. Start with 2 tbsp and add another if you like a stronger taste.
-
1 tsp toasted sesame oil
- Adds a deep, nutty aroma—skip it if you don’t like sesame, but I recommend it.
-
½ cup (120 ml) hot water, plus 1–3 tbsp more as needed
- Hot water helps the rice flour hydrate and come together as a smooth dough.
-
2–3 tbsp white or black sesame seeds (optional, but so good)
- For extra crunch and visual appeal—white, black, or a mix.
-
Oil spray or 1–2 tsp neutral oil for brushing
- To help the tops crisp and brown in the oven.
If you like them extra savory, you can also sprinkle a pinch of garlic powder, onion powder, or even smoked paprika into the dry ingredients. Just don’t go overboard; you still want the rice and soy flavor to shine.
Directions: How to Make Baked Rice Crackers at Home

1. Preheat and prepare your pans
Set your oven to 350°F (175°C). Line 2 large baking sheets with parchment paper or silicone baking mats. This keeps the rice crackers from sticking and helps them crisp evenly without extra oil.
2. Mix the dry ingredients
In a medium bowl, whisk together:
- White rice flour
- Brown rice flour
- Cornstarch or potato starch
- Salt
- Sugar
Make sure everything is well combined—rice flour tends to clump, so give it a good whisk.
3. Add the flavorings and oil
Pour in the neutral oil, soy sauce or tamari, and toasted sesame oil. Use a fork or spatula to stir. The mixture will look sandy and a little crumbly at this stage—that’s exactly right.
4. Add hot water gradually
Pour in the ½ cup hot water and stir. You’re looking for a soft, slightly tacky dough that holds together when you press it with your fingers.
- If it’s too dry and crumbly, add more hot water 1 tablespoon at a time.
- If it gets too wet, sprinkle in a little more rice flour.
You’re aiming for a dough that feels like playdough—pliable, not sticky.
5. Fold in sesame seeds
Gently mix in the sesame seeds if you’re using them. Try not to overwork the dough; that can make the crackers a bit tough. Just fold until they’re evenly distributed.
6. Divide and roll out the dough
Split the dough into two equal portions. Place one half between two sheets of parchment paper.
Use a rolling pin to roll the dough very thin—about 1/16 to 1/8 inch. Thinner dough gives you crispier rice crackers. If you leave them thick, they can be chewier in the center.
You know what? This is the only slightly fussy part, but it’s worth it. Take a minute here and really roll it out evenly.
7. Cut into shapes
Peel off the top layer of parchment. Use a small round cookie cutter, knife, or pizza cutter to cut into:
- Small rounds (classic cracker shape)
- Squares or rectangles (faster and less waste)
Transfer the pieces to your lined baking sheet, leaving a tiny bit of space between them. They don’t spread much, but space helps even baking.
Repeat with the second half of the dough. You can gather and re-roll any scraps once or twice—just don’t overwork them.
8. Brush or spray with oil and add toppings
Lightly brush the tops with a thin coat of neutral oil or spritz with cooking spray.
If you like, sprinkle a little extra salt, sesame seeds, or even a pinch of furikake (Japanese seasoning) over the top of some.
9. Bake until golden and crisp
Bake at 350°F (175°C) for 14–18 minutes, rotating the pans halfway through.
You’re looking for:
- Light golden edges
- Dry, firm surface
- A hollow “snap” when tapped
Remember, every oven runs a little differently. Start checking at the 12-minute mark, especially for thinner crackers or smaller shapes.
10. Cool and crisp up
Remove the trays from the oven and let the crackers cool completely on the pan. They crisp even more as they cool, so don’t judge the final texture while they’re hot.
If some crackers in the center are still a bit soft, you can put the whole tray back in the oven for 2–3 more minutes. Just keep a close eye so they don’t burn.
Servings & Timing
- Yield: About 60–70 small rice crackers (depending on size and thickness)
- Prep Time: 20 minutes
- Rolling/Cutting Time: 15–20 minutes
- Bake Time: 14–18 minutes per batch
- Total Time: Around 50–60 minutes, including cooling
If you’ve got helpers (kids, spouse, a curious neighbor), the rolling and cutting goes even faster—and it turns into a fun little “kitchen project” afternoon.
Fun Variations on This Rice Cracker Recipe
Once you get the base recipe down, you can play around with flavors like crazy. Here are some ideas to get you started:
- Spicy Chili Rice Crackers – Add ½–1 tsp chili flakes, gochugaru, or cayenne to the dry ingredients for a gentle (or not-so-gentle) kick.
- Cheesy Savory Crackers – Mix ¼ cup finely grated Parmesan or nutritional yeast into the dough for a “cheese cracker” vibe.
- Seaweed & Sesame Japanese Rice Crackers – Crumble 1–2 tbsp nori (dried seaweed) or furikake into the dough or sprinkle on top before baking.
- Garlic & Herb Snack Crackers – Add ½ tsp garlic powder and 1 tsp dried herbs (like oregano or thyme) to the dry mix.
- Lightly Sweet Rice Crackers – Use 1 extra tablespoon sugar, skip the soy sauce, and brush the tops lightly with a honey-water mixture before baking.
- Smoky Paprika Crackers – Stir 1 tsp smoked paprika into the dry ingredients for a deeper, almost “BBQ chip” flavor.
How to Store & Keep Them Crispy
The beauty of these homemade rice crackers is that they’re naturally low in moisture. If you store them right, they stay crunchy for days.
-
Room Temperature:
- Store in an airtight container at room temp for up to 7–10 days.
- If your house is humid, tuck a little packet of food-safe desiccant in the jar or add a small piece of paper towel to absorb moisture.
-
Freezer:
- For longer storage, freeze in an airtight container or freezer bag for up to 2 months.
- Let them sit at room temp for 15–20 minutes before serving; no reheating needed.
-
Re-crisping:
- If the crackers soften a bit, spread them on a baking sheet and bake at 300°F (150°C) for 5–7 minutes, then cool completely. They’ll crisp back up nicely.
-
Make-Ahead Tips:
- You can make the dough, wrap it tightly in plastic, and refrigerate up to 24 hours. Bring it to room temp before rolling.
- You can also pre-roll and cut the dough, freeze the unbaked crackers on a tray, then transfer to a bag. Bake from frozen, adding 1–2 extra minutes.
Notes From My Kitchen to Yours
- Thickness matters. Thinner crackers = crispier result. When I rushed and rolled them thicker, they looked pretty but didn’t have that addictive snap.
- Watch the edges. The outer crackers brown faster; if they’re done before the center, you can remove the browned ones and return the pan to the oven for just a few more minutes.
- Play with salt thoughtfully. Soy sauce brands vary a lot in saltiness. If you’re using regular (not low-sodium) soy sauce, taste the dough before adding extra salt.
- Use parchment. Seriously. Rice flour dough can be a little fragile; rolling it between parchment makes your life so much easier and cleanup is simple.
- Small shapes = snackable. When I tested larger crackers, everyone snapped them into smaller pieces anyway. Bite-size is the way to go for a crunchy rice snack.
- Let them cool fully. It’s tempting to taste early (I always “test” one), but the true texture shows up after they cool.
FAQs About Homemade Rice Crackers
1. Can I make this rice cracker recipe completely gluten free?
Yes—use certified gluten free rice flour and switch the soy sauce to gluten free tamari or coconut aminos.
2. My dough is cracking when I roll it. What should I do?
It’s usually too dry; sprinkle in 1–2 teaspoons of hot water, knead gently, and let it rest for 5 minutes before rolling again.
3. Why are my rice crackers chewy instead of crispy?
They were probably too thick or not baked long enough. Roll the dough thinner next time and bake until the edges are lightly golden, then cool fully.
4. Can I use cooked rice instead of rice flour?
Not with this exact recipe. Cooked rice needs a different method and ratio; this one is designed specifically for rice flour.
5. Are these healthy enough for everyday snacking?
Healthy means different things for everyone, but they’re baked, made with simple ingredients, and can be gluten free—much cleaner than many packaged snacks.
6. Can I air fry these rice crackers?
You can, but watch them closely. Air fry at 325°F (160°C) in a single layer for about 6–9 minutes, flipping once; they brown faster than in the oven.
7. Do I have to use both white and brown rice flour?
No. You can use all white rice flour (2 cups total), but the combo gives better flavor and crunch.
8. How can I make them less salty?
Use low-sodium soy sauce, skip any extra salt on top, and reduce the salt in the dough to ¼ teaspoon. You can also balance with a tiny extra pinch of sugar.
Wrapping It Up (Snack in Hand, Hopefully)
These crispy baked rice crackers are such a satisfying little project—simple ingredients, big flavor, and a texture that makes you go back for “just one more.”
If you try this Rice Cracker Recipe, I’d love to hear how you flavored yours—sesame, spicy, cheesy, or something totally different. Leave a comment, rate the recipe, or share a photo of your crunchy rice snack, and if you’re still in a snacking mood, explore more of my healthy snack recipes next.
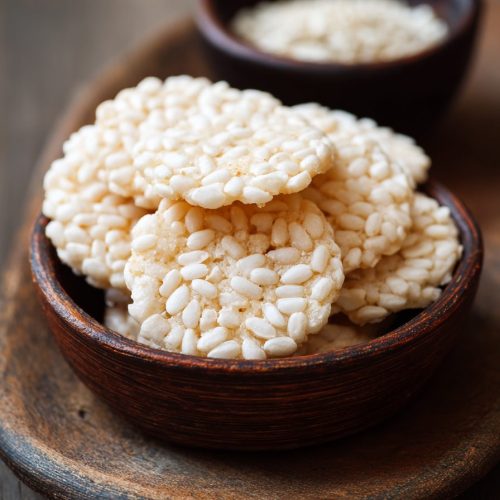
Rice Cracker Recipe (Easy, Crispy & Perfect for Snacking)
Ingredients
- 1 1/2 cups white rice flour regular rice flour, not sweet/glutinous; use certified gluten free if needed
- 1/2 cup brown rice flour adds nutty flavor and crunch; or use more white rice flour (2 cups total)
- 2 tablespoons cornstarch or potato starch potato starch = firmer crunch; cornstarch = lighter crunch
- 1/2 teaspoon fine sea salt plus more for sprinkling on top
- 2 teaspoons sugar balances the salt and soy sauce; does not make crackers sweet
- 3 tablespoons neutral oil such as grapeseed, canola, or avocado oil
- 2–3 tablespoons low-sodium soy sauce or tamari use tamari for gluten free; start with 2 tbsp and add more to taste
- 1 teaspoon toasted sesame oil for nutty aroma; optional but recommended
- 1/2 cup hot water plus 1–3 tablespoons more as needed to form a soft dough
- 2–3 tablespoons sesame seeds white, black, or a mix; optional but adds extra crunch
- neutral oil or cooking spray for brushing or spraying the tops before baking
- extra fine sea salt, sesame seeds, or furikake optional toppings for sprinkling before baking
- optional seasonings pinch of garlic powder, onion powder, smoked paprika, chili flakes, or dried herbs to taste
Instructions
- Preheat the oven to 350°F (175°C). Line 2 large baking sheets with parchment paper or silicone baking mats to prevent sticking and help the crackers crisp evenly.
- In a medium bowl, whisk together the white rice flour, brown rice flour, cornstarch or potato starch, fine sea salt, sugar, and any optional dry seasonings you are using until well combined and free of lumps.1 1/2 cups white rice flour, 1/2 cup brown rice flour, 2 tablespoons cornstarch or potato starch, 1/2 teaspoon fine sea salt, 2 teaspoons sugar, optional seasonings
- Add the neutral oil, soy sauce or tamari, and toasted sesame oil to the dry ingredients. Stir with a fork or spatula until the mixture looks sandy and evenly moistened.3 tablespoons neutral oil, 2–3 tablespoons low-sodium soy sauce or tamari, 1 teaspoon toasted sesame oil
- Pour in 1/2 cup hot water and stir until a soft, slightly tacky dough forms. If the dough is too dry or crumbly, add more hot water 1 tablespoon at a time. If it becomes too wet, sprinkle in a little more rice flour. The dough should feel like pliable playdough and hold together without being sticky.1/2 cup hot water
- Gently fold in the sesame seeds, if using, just until evenly distributed throughout the dough without overworking it.2–3 tablespoons sesame seeds
- Divide the dough into two equal portions. Place one portion between two sheets of parchment paper and roll it out very thin, about 1/16 to 1/8 inch thick, aiming for an even thickness for the crispiest texture. Repeat with the second portion.
- Peel off the top piece of parchment. Use a small round cookie cutter, knife, or pizza cutter to cut the dough into small rounds, squares, or rectangles. Transfer the pieces to the prepared baking sheets, leaving a little space between each cracker. Gather and re-roll scraps once or twice as needed.
- Lightly brush or spray the tops of the crackers with neutral oil or cooking spray. If desired, sprinkle a little extra fine sea salt, sesame seeds, or furikake over the tops for added flavor and texture.neutral oil or cooking spray, extra fine sea salt, sesame seeds, or furikake
- Bake the crackers at 350°F (175°C) for 14–18 minutes, rotating the baking sheets halfway through. The crackers are done when the edges are lightly golden, the surface is dry and firm, and they have a crisp snap when tapped. Begin checking at 12 minutes, especially if your crackers are very thin or small.
- Remove the baking sheets from the oven and let the crackers cool completely on the pans; they will crisp further as they cool. If any crackers in the center are still slightly soft once cooled, return the tray to the oven for 2–3 minutes more, then cool again.
- Serve the rice crackers on their own or with cheese, dips, or tea. Once fully cooled, store in an airtight container at room temperature for up to 7–10 days.
Notes
• Spicy Chili Rice Crackers – Add 1/2–1 teaspoon chili flakes, gochugaru, or cayenne to the dry ingredients.
• Cheesy Savory Crackers – Add 1/4 cup finely grated Parmesan cheese or nutritional yeast to the dough.
• Seaweed & Sesame – Mix 1–2 tablespoons crumbled nori or furikake into the dough or sprinkle on top before baking.
• Garlic & Herb – Add 1/2 teaspoon garlic powder and 1 teaspoon dried herbs (such as oregano or thyme) to the dry mix.
• Lightly Sweet – Increase sugar by 1 tablespoon, omit soy sauce, and lightly brush tops with a thin honey-water mixture before baking.
• Smoky Paprika – Stir 1 teaspoon smoked paprika into the dry ingredients.
STORAGE: Store in an airtight container at room temperature for 7–10 days. For longer storage, freeze in an airtight container or freezer bag for up to 2 months; thaw at room temperature before serving. To re-crisp, bake on a sheet at 300°F (150°C) for 5–7 minutes, then cool completely.
TIPS: Roll the dough very thin for maximum crunch, use parchment when rolling to prevent sticking and tearing, watch outer crackers as they brown faster than the center, and let crackers cool fully before judging crispness. For gluten free crackers, use certified gluten free rice flour and tamari or coconut aminos instead of regular soy sauce.