Would you like to save this?
Instant Pot Cheesecake Recipe
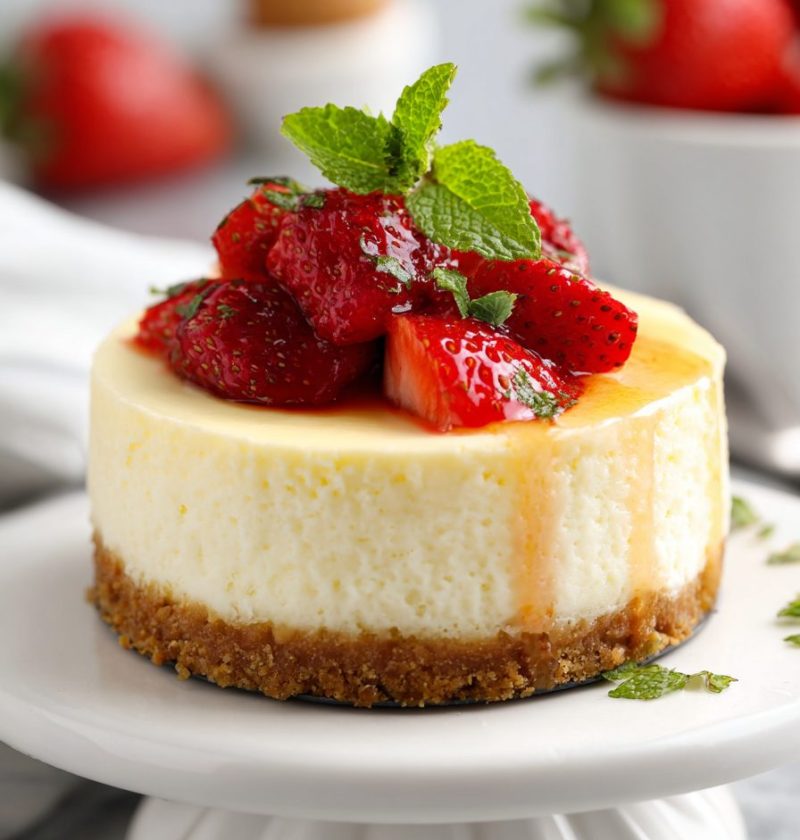
If you’ve been craving a silky, bakery-style cheesecake but don’t feel like heating up the whole kitchen, this Instant Pot Cheesecake Recipe is your new best friend—lush, creamy, no cracks, and surprisingly easy for a weeknight dessert.
Full Recipe Introduction
This Instant Pot Cheesecake Recipe gives you that classic New York–style, rich vanilla cheesecake flavor with a buttery graham cracker crust, but it’s made right in your electric pressure cooker. No guessing about oven hot spots, no water splashing into the pan, and no worrying if it’s overbaked or underbaked.
When Instant Pots first became popular, I’ll be honest—I thought of soups and pot roasts, not a pressure cooker cheesecake. But once I tried my first instant pot dessert recipe, I was hooked. The Instant Pot creates a gentle, steamy environment that acts like a foolproof water bath. That’s why this baked cheesecake in an Instant Pot comes out so smooth, with a creamy cheesecake filling and almost no chance of cracking.
I love serving this for holidays and family birthdays, especially in the summer when I’d rather not turn my oven on for an hour. It’s also perfect when you’re short on oven space—say, Thanksgiving, when the turkey and casseroles have completely taken over.
If you’ve never tried an Instant Pot baking recipe before, this is a great place to start. We’ll use a simple graham cracker crust cheesecake base, a rich but not heavy filling, and a very forgiving no‑crack cheesecake method that works beautifully in an instant pot water bath.
And yes, we’ll talk about what instant pot springform pan to use, how much water to add, and exactly when to take it out—so you can have a quick cheesecake dessert that still tastes like it came from a fancy bakery.
Why You’ll Love This Recipe
- It’s a no‑crack cheesecake method thanks to gentle Instant Pot steam.
- Classic graham cracker crust cheesecake flavor with pantry ingredients.
- No oven required—your electric pressure cooker dessert does all the work.
- Uses a standard instant pot springform pan, nothing fancy or hard to find.
- The texture is unbelievably smooth with a creamy cheesecake filling.
- Great make-ahead instant pot dessert recipe for holidays or parties.
- Reliable results: clear cook times, sensory cues, and troubleshooting tips.
- Easy to customize with flavors—lemon, chocolate, Pumpkin, or fruit toppings.
- Perfect when you want a quick cheesecake dessert that still feels special.
Ingredients
You know what? Cheesecake looks fussy, but the ingredient list is pretty down‑to‑earth. Here’s everything you’ll need for this homemade cheesecake recipe.
For the graham cracker crust
- 1 ½ cups graham cracker crumbs
(about 10–12 full sheets; you can also use digestive biscuits or vanilla wafers) - 2 tablespoons granulated sugar
- ¼ teaspoon fine sea salt
- 5 tablespoons unsalted butter, melted and slightly cooled
For the creamy cheesecake filling
- 16 ounces (2 blocks) full-fat cream cheese, softened
(use brick-style, not the whipped kind; Philadelphia or store brand both work) - ½ cup granulated sugar
- ¼ cup sour cream, room temperature
- ¼ cup heavy cream, room temperature
- 2 large eggs, room temperature
- 1 ½ teaspoons pure vanilla extract
- 1 tablespoon cornstarch
- ¼ teaspoon fine sea salt
For the Instant Pot
- 1 ½ cups water (for the pot)
- Nonstick cooking spray or a little extra butter (for greasing the pan)
Pan and equipment notes
- 7‑inch or 7½‑inch springform pan or push pan labeled for instant pot use
(this size fits most 6‑quart Instant Pots; an 8‑quart can fit a 7–8 inch pan) - Aluminum foil
- Trivet with handles or a silicone sling
- Paper towels
A quick note: room temperature ingredients are key here. Cream cheese, eggs, sour cream, and heavy cream blend together much more smoothly when they’re not cold. That’s one of the small things that separates an easy Instant Pot cheesecake from a lumpy one.

Directions
1. Prepare the pan
Grease your instant pot springform pan lightly with cooking spray or butter. Line the bottom with a round of parchment paper if you’re worried about sticking. Wrap the outside of the pan (bottom and halfway up the sides) with a layer of foil—this helps keep condensation out.
2. Make the graham cracker crust
In a medium bowl, stir together graham cracker crumbs, sugar, and salt. Pour in the melted butter and mix with a fork until the crumbs are evenly moistened and feel like wet sand when you squeeze them in your hand.
3. Press and chill the crust
Pour the crumb mixture into the prepared pan. Press firmly into the bottom and slightly up the sides using the bottom of a measuring cup or glass. You want a tight, even layer; this keeps the crust from crumbling later. Pop the pan in the freezer for 10–15 minutes while you make the filling.
4. Beat the cream cheese and sugar
In a large mixing bowl, beat the softened cream cheese and sugar on medium speed with a hand mixer (or stand mixer) until completely smooth and fluffy, 2–3 minutes. Scrape down the sides and bottom of the bowl—little bits like to hide there.
5. Add sour cream, heavy cream, vanilla, and salt
Add the sour cream, heavy cream, vanilla extract, and salt. Beat again on low to medium speed until fully combined and silky. You’re aiming for a smooth, thick batter, not a frothy one.
6. Mix in the cornstarch
Sprinkle the cornstarch over the batter and mix just until combined. Cornstarch helps stabilize the filling and gives you that tender, rich vanilla cheesecake that slices beautifully.
7. Add the eggs—gently
Add the eggs one at a time, beating on low speed after each addition, just until the yolk disappears. Don’t overmix once the eggs go in; too much air can cause the cheesecake to puff and crack. Finish by gently stirring with a spatula to make sure everything is evenly combined.
8. Pour the filling into the crust
Remove the crust from the freezer. Pour the creamy cheesecake filling into the pan and smooth the top with a spatula. Tap the pan gently on the counter a few times to pop any large air bubbles.
9. Prep the Instant Pot water bath
Pour 1 ½ cups of water into the bottom of your Instant Pot or other electric pressure cooker. Place the trivet with handles (or a silicone sling) into the pot. Carefully set the cheesecake pan on the trivet. If your trivet doesn’t have handles, make a “foil sling” by folding a long strip of foil and placing it under the pan so you can lift it out easily.
10. Cover the cheesecake
Cover the top of the pan loosely with a piece of foil—don’t press it right onto the batter. This helps control condensation so you don’t end up with water droplets on your beautiful pressure cooker cheesecake.
11. Cook the cheesecake
Seal the lid, set the valve to Sealing, and select High Pressure (Manual) for 35 minutes for a 7‑inch pan. Once the cook cycle ends, let the pressure release naturally for 10 minutes, then carefully turn the valve to Venting to release any remaining steam.
12. Check for doneness
Remove the lid and lift the cheesecake out using the trivet or sling. Peel back the foil. The center should jiggle slightly like set Jell‑O, but the edges should look set and not watery. If it looks too loose in the middle, return it to the Instant Pot, cover again, and cook 3–5 more minutes, followed by a 10‑minute natural release.
13. Cool at room temperature
Gently blot any condensation off the foil and pan with a paper towel. Run a thin knife around the edge of the cheesecake (between the cake and the pan) to loosen it. Let it cool at room temperature for about 1 hour. This gradual cooling helps prevent cracks.
14. Chill completely
Cover the pan (foil or plastic wrap is fine) and refrigerate for at least 6 hours, preferably overnight. This is when the texture goes from “good” to “amazing”—the flavors meld, and the cheesecake firms up into that classic, velvety slice.
15. Serve
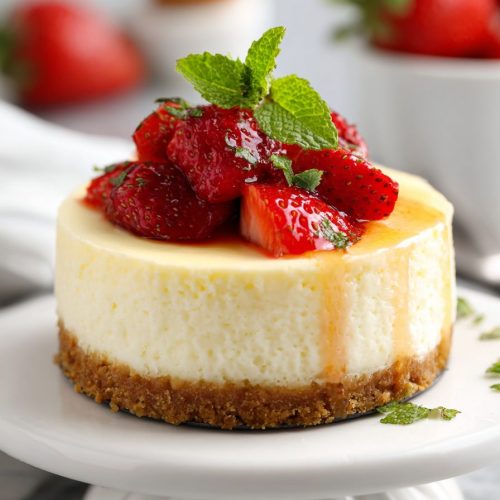
When ready to serve, unlatch the springform pan and gently remove the ring. Slide the cheesecake onto a serving plate if you used parchment, or simply leave it on the base. Slice with a sharp knife wiped clean between cuts. Top with fresh berries, fruit compote, chocolate sauce, or a dollop of whipped cream.
Servings & Timing
Yield:
- Serves 8–10 (depending on how generous your slices are)
Timing:
- Prep Time: 20 minutes
- Pressure Cook Time: 35–40 minutes
- Natural Release & Cooling: 1 hour 15 minutes
- Chill Time: 6 hours (or overnight)
- Total Time: About 8 hours, mostly hands-off
It sounds long, but most of that is chill time. This is one of those easy Instant Pot cheesecake recipes that you make ahead, forget about, and then feel very proud of when dessert time rolls around.
Variations
Once you’ve made this classic rich vanilla cheesecake, you can have some fun with it.
- Lemon Cheesecake: Add 1–2 tablespoons fresh lemon juice and 1 teaspoon lemon zest to the filling for a bright, tangy twist.
- Chocolate Swirl Cheesecake: Melt ½ cup semisweet chocolate chips, cool slightly, and swirl into the top of the batter before cooking.
- Pumpkin Spice Cheesecake: Mix ½ cup Pumpkin puree and 1 teaspoon pumpkin pie spice into the filling for a cozy fall Instant Pot baking recipe.
- Berry Topped Cheesecake: Spoon homemade berry compote or store‑bought pie filling over the chilled cheesecake right before serving.
- Oreo Crust Cheesecake: Swap the graham crackers for crushed chocolate sandwich cookies for a darker, more intense crust.
- Lighter Version: Use Neufchâtel (⅓ less fat) cream cheese and Greek yogurt instead of sour cream for a slightly lighter electric pressure cooker dessert.
Storage & Reheating
Cheesecake actually thrives on being made ahead, which is one reason I love it for entertaining.
- Fridge: Store the cheesecake tightly covered in the refrigerator for up to 5 days. I like to keep it in the springform base and cover the whole thing.
- Freezer: For longer storage, freeze individual slices on a tray until firm, then wrap each slice in plastic wrap and place in a freezer bag. They’ll keep well for up to 2 months.
- Thawing: Thaw frozen slices in the fridge overnight or on the counter for 30–45 minutes.
- Reheating: Cheesecake’s best served chilled or slightly cool, so no real reheating is needed—if you prefer it closer to room temperature, just set your slice out for 15–20 minutes before serving.
If you’re planning ahead for a holiday, you can make this Instant Pot cheesecake 1–2 days in advance, chill it, and add any toppings right before serving.
Notes
A few things I’ve learned after more Instant Pot cheesecakes than I care to admit:
- Room temperature is not optional. Cold cream cheese leads to a lumpy filling, and no one wants that.
- Don’t rush the chill. I know—it’s hard to wait. But that long chill time is what turns a good cheesecake into a restaurant-quality one.
- Watch the jiggle. This is your main doneness clue. The edges should be set, the middle should wobble a bit, but not look liquid.
- Condensation happens. If a little water lands on top, just blot gently with a paper towel—no harm done.
- Customize the sweetness. If you prefer a sweeter cheesecake, bump the sugar in the filling to ⅔ cup. If you like it less sweet, you can drop to ⅓ cup.
Also, if you enjoy this, you might like playing around with other Instant Pot dessert recipes—think rice pudding or a small batch bread pudding—because once you’re comfortable using your Instant Pot as a tiny, steamy oven, a whole new dessert world opens up.
FAQs
Can I use low‑fat cream cheese?
You can, but the texture won’t be as rich and creamy. For the best results, I recommend full‑fat cream cheese for this Instant Pot cheesecake recipe.
My cheesecake cracked—what happened?
Usually, cracks come from overmixing (too much air), overcooking, or cooling too fast. The good news? A little crack is easy to hide with fruit or whipped cream, and it still tastes amazing.
Can I make this in an 8‑quart Instant Pot?
Yes. Use the same ingredients and timing; just make sure your pan fits comfortably and you still add at least 1 ½ cups water for the Instant Pot water bath.
Do I have to use a springform pan?
A springform or push pan is strongly recommended for pressure cooker cheesecake because it’s much easier to release clean slices, but a deep 7‑inch cake pan can work in a pinch if you line it well.
Can I shorten the chill time?
You can try serving after 4 hours, but the texture is much better after a full overnight chill. Think of it as giving the cheesecake time to settle into itself.
Why is my crust soggy?
Usually this means the pan wasn’t wrapped well or there was a lot of condensation. Next time, double‑wrap the bottom with foil and make sure the crust is well packed.
How do I prevent the top from getting wet?
Cover the pan loosely with foil before cooking and blot any condensation that collects on the foil before you remove it.
Can I double this recipe?
You can’t stack two cheesecakes in one pot at the same time, but you can make two back to back. Keep the same cook time and chill them separately.
Conclusion
This Instant Pot Cheesecake Recipe gives you everything you love about classic cheesecake—rich vanilla flavor, a buttery graham cracker crust, and a silky, creamy center—without worrying about fussy oven baking. It’s simple enough for a Tuesday night treat, yet special enough for birthdays, holidays, and every “just because” moment in between.
If you try this easy Instant Pot cheesecake, I’d love to hear how it turned out—leave a comment, share your favorite topping combo, or tell me if your family has claimed the last slice before you could blink. And if you’re in the mood for more Instant Pot dessert recipes, stick around and explore; once your pressure cooker starts making sweets, it’s hard to stop.
Instant Pot Cheesecake
Ingredients
- 1 1/2 cups graham cracker crumbs about 10–12 full sheets; or use digestive biscuits or vanilla wafers
- 2 tablespoons granulated sugar for the crust
- 1/4 teaspoon fine sea salt for the crust
- 5 tablespoons unsalted butter melted and slightly cooled, for the crust
- 16 ounces cream cheese full‑fat, brick-style, softened; 2 blocks
- 1/2 cup granulated sugar for the filling; adjust to taste
- 1/4 cup sour cream room temperature
- 1/4 cup heavy cream room temperature
- 2 large eggs room temperature
- 1 1/2 teaspoons pure vanilla extract
- 1 tablespoon cornstarch
- 1/4 teaspoon fine sea salt for the filling
- 1 1/2 cups water for the Instant Pot
- nonstick cooking spray or butter for greasing the pan
- aluminum foil for wrapping and covering the pan
- parchment paper optional, to line the bottom of the pan
- fresh berries, fruit compote, chocolate sauce, or whipped cream optional, for serving
Instructions
- Lightly grease a 7‑inch or 7½‑inch Instant Pot–safe springform or push pan with cooking spray or butter. Optionally line the bottom with a round of parchment paper. Wrap the outside of the pan (bottom and halfway up the sides) with a layer of aluminum foil to help keep condensation out.nonstick cooking spray or butter, aluminum foil, parchment paper
- In a medium bowl, combine the graham cracker crumbs, 2 tablespoons granulated sugar, and 1/4 teaspoon fine sea salt. Pour in the melted butter and mix with a fork until the crumbs are evenly moistened and feel like wet sand when squeezed.1 1/2 cups graham cracker crumbs, 2 tablespoons granulated sugar, 1/4 teaspoon fine sea salt, 5 tablespoons unsalted butter
- Pour the crumb mixture into the prepared pan. Press firmly into the bottom and slightly up the sides using the bottom of a measuring cup or glass to create a tight, even layer. Place the pan in the freezer for 10–15 minutes while you make the filling.1 1/2 cups graham cracker crumbs, 5 tablespoons unsalted butter
- In a large mixing bowl, beat the softened cream cheese and 1/2 cup granulated sugar on medium speed with a hand or stand mixer until completely smooth and fluffy, 2–3 minutes. Scrape down the sides and bottom of the bowl as needed.16 ounces cream cheese, 1/2 cup granulated sugar
- Add the sour cream, heavy cream, vanilla extract, and 1/4 teaspoon fine sea salt to the bowl. Beat on low to medium speed just until fully combined and silky. The batter should be smooth and thick, not frothy.1/4 cup sour cream, 1/4 cup heavy cream, 1 1/2 teaspoons pure vanilla extract, 1/4 teaspoon fine sea salt
- Sprinkle the cornstarch over the batter and mix just until incorporated. This helps stabilize the filling and gives clean slices.1 tablespoon cornstarch
- Add the eggs one at a time, beating on low speed after each addition just until the yolk disappears. Avoid overmixing once the eggs are added to prevent incorporating too much air. Finish by gently stirring the batter with a spatula to ensure it is evenly combined.2 large eggs
- Remove the chilled crust from the freezer. Pour the cheesecake filling into the pan and smooth the top with a spatula. Tap the pan gently on the counter a few times to release any large air bubbles.16 ounces cream cheese, 1/2 cup granulated sugar, 1/4 cup sour cream, 1/4 cup heavy cream, 2 large eggs, 1 1/2 teaspoons pure vanilla extract, 1 tablespoon cornstarch, 1/4 teaspoon fine sea salt
- Pour 1 1/2 cups of water into the bottom of the Instant Pot. Place the trivet with handles or a silicone sling in the pot. Carefully set the filled cheesecake pan on the trivet. If your trivet has no handles, create a foil sling by folding a long strip of foil and placing it under the pan to help lift it out later.1 1/2 cups water, aluminum foil
- Loosely cover the top of the pan with a piece of foil, without pressing it directly onto the batter. This helps minimize condensation from dripping onto the cheesecake.aluminum foil
- Secure the Instant Pot lid and set the valve to Sealing. Select High Pressure (Manual) for 35 minutes for a 7‑inch pan. When the cook time ends, allow the pressure to release naturally for 10 minutes, then carefully turn the valve to Venting to release any remaining steam.
- Remove the lid and carefully lift out the cheesecake using the trivet or foil sling. Peel back the foil cover. The center should jiggle slightly like set gelatin, while the edges should look set and not watery. If the center looks too loose, return the pan to the Instant Pot, cover again, and cook for an additional 3–5 minutes at High Pressure, followed by another 10‑minute natural release.aluminum foil
- Gently blot any condensation from the foil and outside of the pan with a paper towel. Run a thin knife around the edge of the cheesecake to loosen it from the sides of the pan. Let the cheesecake cool at room temperature for about 1 hour to help prevent cracks.
- Cover the cooled cheesecake pan with foil or plastic wrap and refrigerate for at least 6 hours, preferably overnight, until fully chilled and set.aluminum foil
- When ready to serve, unlatch the springform pan and gently remove the ring. If you used parchment, slide the cheesecake onto a serving plate. Slice with a sharp knife, wiping the blade clean between cuts. Top with fresh berries, fruit compote, chocolate sauce, or whipped cream if desired.fresh berries, fruit compote, chocolate sauce, or whipped cream