Would you like to save this?
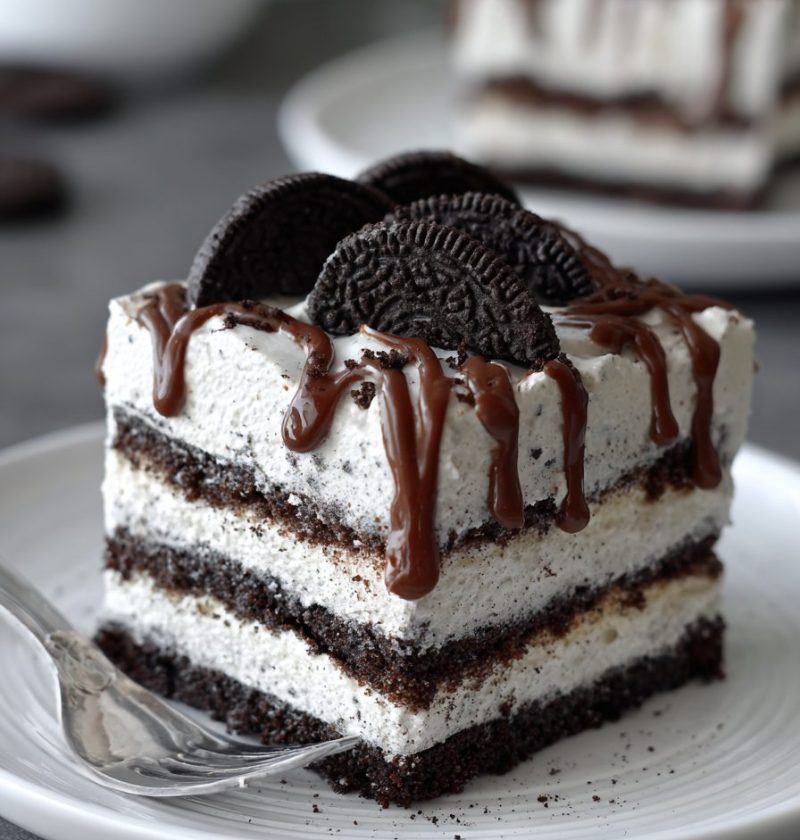
Oreo Icebox Cake Recipe
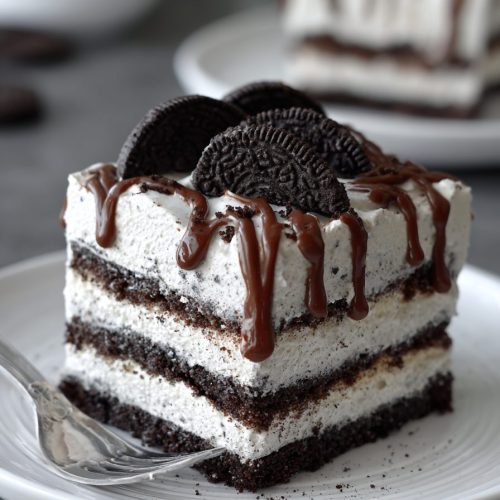
If you’re craving a rich, Chocolatey dessert that’s no-fuss and no-bake, this Oreo Icebox Cake Recipe is your new secret weapon—layers of Oreo cookies, fluffy whipped cream filling, and a cool, creamy texture that feels like summer in a pan.
A No-Bake Classic With a Modern Twist
An Oreo icebox cake is one of those magical “refrigerator cakes” our grandmothers made long before no bake dessert became a Pinterest category. The idea is simple: sandwich cookies soften in the fridge as they rest in whipped cream, turning from crisp to cake-like, with zero oven time.
This version leans into everything we love about a layered Oreo cake—deep chocolate cookie flavor, creamy vanilla filling, and that nostalgic “cookies and cream” bite. It’s a simple Oreo dessert recipe that feels special enough for birthdays, cookouts, and potlucks, but easy enough for a Tuesday night when you just need something sweet.
As a 50-year-old mom who’s hosted more graduation parties and backyard barbecues than I can count, I’ve learned one thing: people lose their minds over Oreo desserts. This icebox cake with Oreos checks every box. It’s a make ahead dessert, it feeds a crowd, and it holds up beautifully on a buffet table.
You can keep it light with homemade whipped cream, or lean into convenience with a cool whip Oreo cake style shortcut. Either way, you get gorgeous Oreo whipped cream layers that slice cleanly and taste like you fussed way more than you did.
Why You’ll Love This Oreo Icebox Cake Recipe
- No oven needed—perfect for hot days when you refuse to turn on the stove.
- Only a handful of ingredients you can grab at any grocery store.
- Easy Oreo cake that even beginners (or kids) can assemble.
- Make ahead dessert that tastes better after chilling.
- Crowd-pleasing flavor—this Oreo dessert recipe disappears fast at parties.
- Flexible: use homemade whipped cream or Cool Whip, your choice.
- Works as a summer dessert recipe, holiday treat, or birthday “cake.”
- Simple to decorate but looks impressive on the table.
- Easy to tweak for different flavors—mint, peanut butter, or mocha.
Ingredients for This Easy Oreo Dessert Recipe

Base Ingredients
- 1 family-size package Oreo cookies (about 45–48 cookies; regular, not Double Stuf)
- 3 cups cold heavy whipping cream (look for at least 36% milk fat)
- 1/3 cup powdered sugar (also called confectioners’ sugar)
- 2 teaspoons pure vanilla extract
- Pinch of fine sea salt (enhances the chocolate flavor)
Optional Rich & Stable Whipped Cream Filling
- 4 ounces cream cheese, softened (for a thicker, cheesecake-like layer)
- You can also use mascarpone for a slightly sweeter, more “Italian dessert” feel.
For Topping (Optional but Fun)
- 6–8 extra Oreo cookies, crushed or chopped for garnish
- Chocolate syrup or hot fudge sauce, warmed slightly for drizzling
- Mini chocolate chips, sprinkles, or shaved chocolate
Ingredient Tips & Simple Swaps
- Oreo cookies: Classic Oreos work best. Double Stuf can make the layers slide around a little, but if that’s what you have, just press them in gently. Store-brand chocolate sandwich cookies also work in this refrigerator cake.
- Heavy cream: Use heavy whipping cream, not half-and-half or milk. Cold cream whips faster and gives you that lush whipped cream filling. I set the carton in the coldest part of the fridge for at least an hour.
- Powdered sugar: It dissolves better than granulated sugar, giving you a smooth, light texture.
- Cream cheese: If you want your oreo layer dessert to slice sharply and hold shape on a hot day, cream cheese in the filling is your friend. Just bring it to room temperature so it blends smoothly with the cream.
- Cool Whip option: For a cool whip Oreo cake shortcut, you can use two 8-ounce tubs of thawed whipped topping instead of the heavy cream, powdered sugar, and vanilla. It’s not as “from scratch,” but it’s fast and stable.
How to Make Oreo Icebox Cake (Step-by-Step)
1. Chill your tools and ingredients
Place your mixing bowl and beaters (or whisk attachment) in the fridge for 10–15 minutes. Cold tools help the heavy cream whip faster and stay fluffy. Keep your cream in the fridge until you’re ready to whip it.
2. Make the whipped cream filling
Add the cold heavy cream, powdered sugar, vanilla, and salt to the chilled bowl. If you’re using cream cheese, beat the cream cheese first until smooth, then pour in the cream mixture. Beat on medium-high speed until you get firm peaks—when you lift the beater, the whipped cream stands up and just slightly curls at the tip. Don’t walk away while it’s whipping; it can go from perfect to grainy if overwhipped.
3. Prep your pan
Use a 9×13-inch baking dish or similar. You can lightly grease the bottom or line it with parchment if you want easier lifting later, but it’s not required. Glass dishes are nice because you can see the oreo whipped cream layers from the side.
4. Start with a thin layer of cream
Spread 1/2 to 3/4 cup of whipped cream in the bottom of the pan. This keeps the first layer of cookies from slipping and helps them soften evenly. It doesn’t need to be perfect, just mostly covered.
5. Add the first Oreo layer
Arrange Oreos in a single layer over the cream. You might need to break a few cookies in half to fill in gaps. Don’t worry if there are some small spaces—once the cake chills, the whipped cream fills everything in and the cookies soften into a chocolate cookie dessert base.
6. Add a thick layer of whipped cream
Spread about 1 to 1 1/2 cups of whipped cream over the Oreos. Use an offset spatula or the back of a spoon to gently press the cream down between the cookies. This helps that dreamy layered oreo cake texture form as it chills.
7. Repeat the layers
Continue layering: Oreos, then whipped cream, until you run out of cookies. You’ll usually get 3–4 cookie layers in a 9×13 pan. Try to end with a layer of whipped cream on top. Smooth the surface, then swirl it a little if you want a rustic, bakery-style look.
8. Add toppings
Sprinkle the top with crushed Oreo crumbs, chopped Oreos, or mini chocolate chips. Drizzle with chocolate syrup or fudge if you like. This is the fun part—kids love helping with this step.
9. Chill the cake
Cover the pan tightly with plastic wrap or foil. Refrigerate for at least 6 hours, but 8–12 hours is even better. Overnight gives the cookies time to soften fully and turn into that soft, cake-like texture that makes an icebox cake with Oreos so good.
10. Slice and serve
When you’re ready to serve, use a sharp knife and wipe it between cuts for neat slices. A small metal spatula helps lift each piece without losing those pretty Oreo layers. Serve cold, straight from the fridge.
Servings & Timing
Yield:
- Serves 12–16, depending on portion size (it’s rich, so smaller squares work well).
Time:
- Prep Time: About 20 minutes
- Chill Time: 6–12 hours (overnight recommended)
- Total Time: 6 hours 20 minutes to 12 hours 20 minutes
Here’s the thing: this is one of those desserts that actually needs that rest time. The longer chill lets the cookies hydrate in the cream, turning a simple stack of Oreos into a tender, sliceable refrigerator cake.
Fun Variations to Try
Mint Oreo Icebox Cake – Use Mint Oreos and add 1/4 teaspoon peppermint extract to the whipped cream for a cool, refreshing twist.
Peanut Butter Oreo Layer Dessert – Drizzle warm peanut butter between the cookie layers or whisk 1/4 cup creamy peanut butter into the cream cheese before adding the whipped cream.
Mocha Oreo Icebox Cake – Add 1–2 teaspoons instant espresso powder to the cream for a coffeehouse-style chocolate cookie dessert.
Strawberry Oreo Icebox Cake – Add sliced fresh strawberries between layers for a fruity summer dessert recipe that tastes like chocolate-covered berries.
Gluten-Free Oreo Icebox Cake – Use gluten-free chocolate sandwich cookies and check that your toppings are gluten-free as well.
Cool Whip Oreo Cake Shortcut – Swap the homemade whipped cream for two tubs of thawed Cool Whip to make a fast, budget-friendly dessert that still tastes amazing.
Storage, Freezing & Make-Ahead Tips
This Oreo Icebox Cake Recipe is a dream when you’re planning ahead for parties or holidays.
- Fridge: Cover tightly and refrigerate for up to 4 days. The texture is best between days 1 and 3, when the cookies are soft but not mushy.
- Freezer: Freeze leftovers (or the whole cake) tightly wrapped for up to 1 month. Let it sit at room temperature for 20–30 minutes before slicing. The texture will be a bit firmer, almost like an ice cream cake.
- Make ahead: Assemble the cake the night before you need it. For a next-day lunch or dinner, aim for at least 8 hours of chill time.
- Transporting: If you’re taking this to a picnic or potluck, keep it in a cooler with ice packs. Most fridges run around 37–40°F; a warm car does not.
Notes from My Kitchen
You know what? The first time I tested this recipe, I didn’t chill it long enough. Everyone was ready for dessert, and I pulled it out after just 3 hours. It was good—but the Oreos were still a little crunchy in the middle. The next day, the leftovers were perfect. That’s when I became very firm about the chill time.
A few more little lessons I’ve learned:
- Whipped cream vs. Cool Whip: Homemade whipped cream gives a fresher, lighter flavor and feels more “from scratch.” Cool Whip makes the layers more stable and sweet. Use what fits your schedule and taste.
- Stabilized filling: Adding cream cheese gives a slightly tangy, cheesecake-style flavor and makes it easier to cut clean slices, especially for parties.
- Layer thickness: Don’t go too heavy on the cream between each layer. If the layers are thick, the cookies can shift when you slice it. Aim for an even, medium layer and really press it down gently over the cookies.
- Decorating: A simple line of whole Oreos along the top edge looks so pretty. I’ve also done crushed cookies in the center with chocolate shavings around the outside. Kids don’t care; they just want the biggest piece.
If you enjoy this dessert, you might also like a Chocolate Lasagna-style layered pudding dessert or a classic Banana Pudding with vanilla wafers—those same “softer overnight” vibes.
Oreo Icebox Cake Recipe FAQs
Can I make this Oreo icebox cake the day of serving?
You can, but give it at least 6 hours in the fridge. Less than that and the cookies will still be pretty crunchy.
Can I use flavored Oreos?
Yes—Mint, Golden, Birthday Cake, or even seasonal varieties work. Just remember the flavor of the cookies will drive the whole dessert, so choose something you’d enjoy in a layered Oreo cake.
What if my whipped cream turns grainy?
You likely overwhipped it. You can gently stir in 1–2 tablespoons of extra cream by hand to smooth it back out a bit, but if it’s very stiff, it may be too far gone.
Can I cut this recipe in half?
Absolutely. Use an 8×8 or 9×9-inch pan and about half the ingredients, and you’ll still get lovely Oreo whipped cream layers.
Is this Oreo dessert recipe very sweet?
It’s sweet, but not overwhelmingly so—especially if you use homemade whipped cream. If you’re sensitive to sweetness, you can reduce the powdered sugar to 1/4 cup.
Can I use low-fat or light whipped topping?
You can, but the texture will be lighter and may not hold layers as firmly. Full-fat cream or regular Cool Whip gives the most stable refrigerator cake.
How do I keep the first piece from falling apart?
Let the cake chill fully, cut with a sharp knife, and use a small offset spatula or pie server to lift that first piece. Once one piece is out, the rest are easier.
Can I add pudding to this recipe?
Yes! You can spread a thin layer of prepared instant vanilla or chocolate pudding between one of the Oreo layers for an extra-creamy icebox cake with Oreos. Just keep the layers thinner so the cake doesn’t get too tall and wobbly.
Final Thoughts
This Oreo Icebox Cake Recipe is one of those desserts that quietly works its way into your regular rotation—no bake, simple ingredients, big payoff, and plenty of room for your own twists. It’s the kind of chocolate cookie dessert that makes kids’ eyes light up and grown-ups ask for the recipe before they’ve finished the first slice.
If you make this cake, I’d love to hear how it turns out for you—tell me which variation you tried, or what occasion you made it for. And if you’re in the mood for more no bake dessert ideas, try pairing this with a pan of chocolate lasagna or a simple strawberry fluff salad for a full “no-oven” dessert table.
Oreo Icebox Cake
Ingredients
- 1 family-size package Oreo cookies about 45–48 cookies; regular, not Double Stuf
- 3 cups heavy whipping cream cold; at least 36% milk fat
- 1/3 cup powdered sugar also called confectioners’ sugar
- 2 teaspoons pure vanilla extract
- pinch fine sea salt enhances the chocolate flavor
- 4 ounces cream cheese softened; optional, for a thicker, more stable filling
- 6-8 Oreo cookies crushed or chopped, for garnish (optional)
- chocolate syrup or hot fudge sauce warmed slightly, for drizzling (optional)
- mini chocolate chips, sprinkles, or shaved chocolate for topping (optional)
- 2 containers Cool Whip or whipped topping 8 ounces each; optional substitute for cream, sugar, and vanilla
Instructions
- Place your mixing bowl and beaters (or whisk attachment) in the refrigerator for 10–15 minutes to chill. Keep the heavy cream in the fridge until you are ready to whip it; cold tools and cream help it whip quickly and hold its structure.
- If using cream cheese, beat the softened cream cheese in the chilled bowl first until completely smooth. Add the cold heavy cream, powdered sugar, vanilla, and a pinch of fine sea salt. Beat on medium-high speed until firm peaks form—when you lift the beater, the cream should stand up and just slightly curl at the tip. Do not overwhip or it can become grainy.
- Use a 9×13-inch baking dish. You may lightly grease the bottom or line it with parchment paper for easier serving, but this is optional. A glass dish lets you see the layers from the side.
- Spread about 1/2 to 3/4 cup of the whipped cream evenly over the bottom of the dish in a thin layer. This helps keep the first layer of cookies from sliding and ensures they soften evenly.
- Arrange a single layer of Oreo cookies over the whipped cream, breaking a few cookies if needed to fill in gaps. Small spaces are fine; the cream will fill them in as the cake chills.
- Spread about 1 to 1 1/2 cups of whipped cream over the Oreo layer. Use an offset spatula or the back of a spoon to gently press the cream down so it settles between the cookies and covers them evenly.
- Repeat the layering process—Oreo cookies, then whipped cream—until you run out of cookies, usually 3–4 cookie layers in a 9×13-inch pan. End with a layer of whipped cream on top and smooth or swirl it decoratively.
- Sprinkle the top with crushed or chopped Oreos and, if desired, mini chocolate chips, sprinkles, or shaved chocolate. Drizzle with chocolate syrup or warm fudge for extra richness.
- Cover the dish tightly with plastic wrap or foil. Refrigerate for at least 6 hours, preferably 8–12 hours or overnight. This resting time allows the Oreos to soften into a cake-like texture.
- When ready to serve, remove the cover and use a sharp knife to cut neat squares, wiping the blade between cuts if needed. Use a small metal spatula or pie server to lift out each piece. Serve cold, straight from the fridge.