Would you like to save this?
Butterfinger Cake Recipe
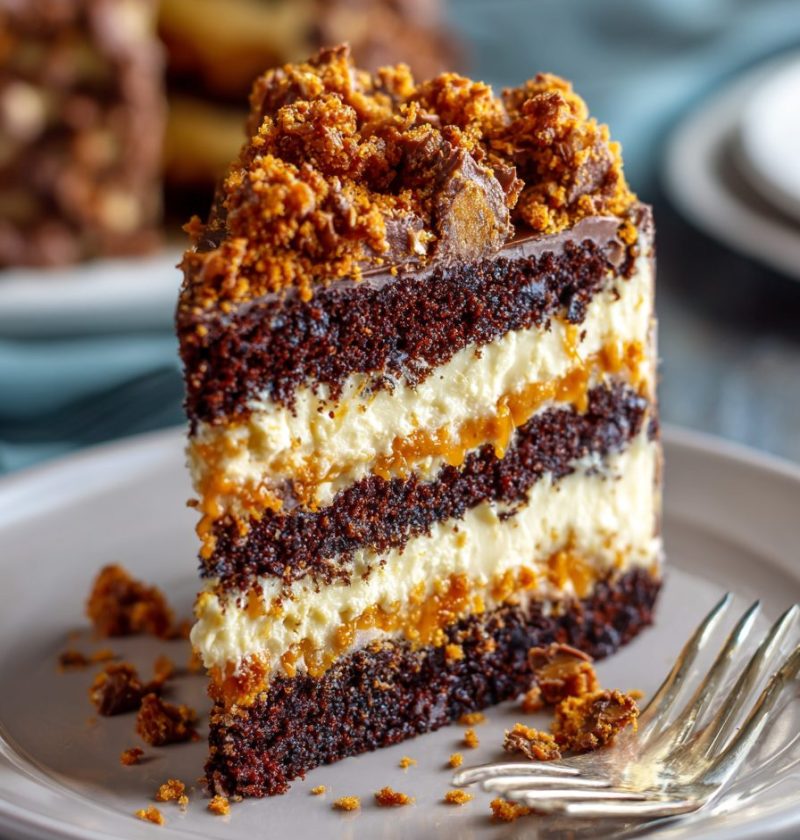
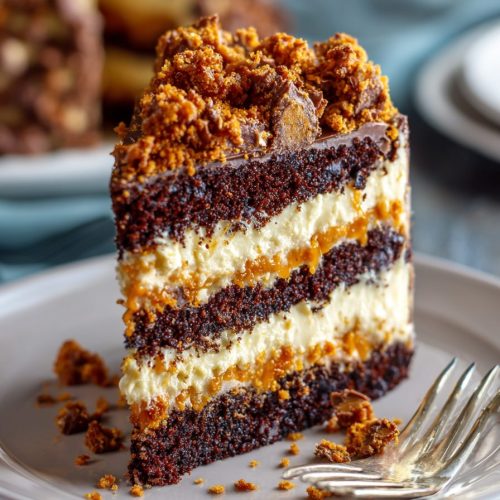
If you love candy bars and easy, crowd-pleasing desserts, this Butterfinger Cake Recipe is about to become your new go-to party potluck cake—soft yellow cake, creamy caramel filling, fluffy Cool Whip frosting, and a generous crushed Butterfinger topping in every single bite.
What Makes This Butterfinger Cake Recipe So Special?
This Butterfinger cake is an old-school poke cake dessert that tastes like a cross between a chocolate candy dessert cake and a creamy caramel cake you’d find in a country diner. We start with a yellow cake mix recipe (yes, a simple box mix—no shame here), soak it with sweet caramel and condensed milk, then top it with a light, cool whip frosting cake layer and plenty of chopped Butterfinger candy dessert pieces.
It’s refrigerated, so it stays extra moist and almost pudding-like, the way a good refrigerated poke cake should. I like to think of it as a candy Bar Cake that just happens to be simple enough for a Tuesday night but impressive enough for a birthday party.
I first started making this cake back in the late ‘90s when my kids were in elementary school. Every time there was a teacher appreciation lunch, guess what I was asked to bring? This exact chocolate Butterfinger cake. My son used to joke that his teachers liked the cake more than they liked math. Honestly, they might have been right.
This recipe is also very forgiving. You can make it the night before, stash it in the fridge, and not think about it again until it’s time to serve. No fancy decorating skills, no fussy layers—just a cool, creamy, easy Butterfinger dessert that everyone hovers around.
And because we’re chatting like friends here, I’ll add this: if your life is busy (whose isn’t?), this is the kind of dessert that lets you show up with something that tastes like you spent all day in the kitchen… even though you absolutely did not.
Why You’ll Love This Butterfinger Cake Recipe
- Ridiculously easy: Starts with a box yellow cake mix, so you’re halfway there before you even preheat the oven.
- Serious candy bar flavor: Tastes like a Butterfinger candy bar turned into a creamy, dreamy poke cake dessert.
- Perfect make-ahead dessert: This refrigerated poke cake actually tastes better after chilling a few hours or overnight.
- Amazing for gatherings: Feeds a crowd and travels well for potlucks, game days, and family reunions.
- Kid and adult favorite: The crushed Butterfinger topping and caramel poke cake layers win over every age.
- Customizable: Easy to swap flavors—use chocolate cake, different candy bars, or change up the sauces.
- No decorating stress: Cool Whip frosting goes on smooth, hides any imperfections, and looks pretty with candy on top.
- Budget-friendly: Uses simple pantry ingredients and one bag of candy bars for a party-worthy dessert.
Now let’s walk through exactly what you’ll need.
Ingredients for the Best Butterfinger Cake Recipe
You don’t need anything fancy here—this is a very “grocery store friendly” chocolate candy dessert cake. I’ll give a few helpful notes and substitutions along the way.
For the Cake Base
- 1 box yellow cake mix (15.25 oz; any brand like Betty Crocker, Pillsbury, or Duncan Hines)
- Ingredients called for on the cake mix box
- Usually:
- 3 large eggs
- 1/2 cup vegetable oil
- 1 cup water
- (Check your box and follow its instructions; that’s your starting point.)
- Usually:
Tip: If you want a richer flavor, you can swap the water for whole milk and add an extra egg yolk. It makes the cake more tender and a little more “from scratch” tasting.
For the Poke Filling
- 1 can (14 oz) sweetened condensed milk
- 1 jar (12–14 oz) caramel ice cream topping
- Look for “caramel sundae syrup” or “caramel topping”—Smucker’s, Ghirardelli, or store brand all work.
This combination is what turns a plain yellow cake into a creamy caramel cake that stays moist for days.
For the Topping & Frosting
- 8–10 fun-size Butterfinger candy bars
- Or about 1 and 1/2 to 2 cups roughly crushed Butterfinger pieces.
- 1 tub (8 oz) frozen whipped topping (Cool Whip), thawed in the fridge
- 1 package (8 oz) cream cheese, softened to room temperature
- 1 cup powdered sugar, sifted if lumpy
- 1 teaspoon pure vanilla extract
Tip: Full-fat cream cheese gives you a smoother, richer cool whip frosting cake. Reduced-fat can work, but it’ll be a bit softer.
Optional but Delicious
- Extra chocolate sauce or chocolate syrup for drizzling
- A pinch of flaky sea salt on top to balance the sweetness
- Chocolate cake mix instead of yellow cake, if you want a true chocolate Butterfinger cake
You know what? None of these are required, but they definitely dress it up when you’re bringing this as a showpiece party potluck cake.

How to Make This Butterfinger Cake Recipe
This is a classic poke cake dessert method—bake, poke, soak, chill, top. Let me explain it step by step so it’s completely stress-free.
1. Preheat and prep your pan
- Preheat your oven to 350°F (175°C).
- Lightly grease a 9×13-inch baking pan with nonstick spray or butter. You can also line it with parchment for easier removal, but it’s not required.
2. Mix and bake the cake
- In a large bowl, prepare the yellow cake mix according to the package directions, using the eggs, oil, and water (or milk) called for.
- Beat with a hand mixer or whisk until the batter is smooth and no dry streaks remain—about 2 minutes.
- Pour the batter into the prepared pan and spread it evenly.
- Bake for 25–30 minutes, or until the top is golden and a toothpick inserted in the center comes out clean.
Visual cue: The cake should spring back lightly when tapped in the center.
3. Cool slightly and poke the cake
- Let the baked cake cool on a wire rack for about 10–15 minutes. It should still be warm, not hot.
- Using the handle of a wooden spoon, a chopstick, or the thick end of a butter knife, poke holes all over the cake, about 1 inch apart. Go almost all the way to the bottom of the pan without tearing the cake apart.
This is where the “poke cake” magic happens. The holes are what turn this from plain cake into a luscious refrigerated poke cake with pockets of caramel goodness.
4. Mix the caramel filling and pour
- In a medium bowl or large measuring cup, whisk together:
- 1 can sweetened condensed milk
- 1 jar caramel topping
until completely smooth.
- Slowly pour this mixture evenly over the warm, poked cake. Take your time so it seeps into the holes and doesn’t just run to the edges.
Tip: Use the back of a spoon or an offset spatula to gently coax the caramel mixture across the surface, nudging it into the holes.
5. Chill the cake
- Let the cake cool completely to room temperature, then cover it with plastic wrap.
- Refrigerate for at least 3 hours, but overnight is even better. This resting time is what gives you that ultra-moist, creamy caramel cake texture.
6. Make the cream cheese Cool Whip frosting
- While the cake chills, beat the softened cream cheese in a medium bowl until smooth and creamy.
- Add the powdered sugar and vanilla, and beat again until fluffy and well combined.
- Gently fold in the thawed Cool Whip with a spatula, mixing just until no streaks remain. You want it light and airy, not overmixed.
Now you’ve got a fluffy, tangy-sweet frosting that balances all that candy bar richness.
7. Crush the Butterfingers
- Place the Butterfinger candy bars in a zip-top bag.
- Crush them with a rolling pin, heavy pan, or even your hands—leave some small chunks for crunch and some finer crumbs for coverage.
Tip: If you prefer, you can use pre-crushed Butterfinger baking bits, but freshly crushed bars usually have better texture and flavor.
8. Assemble the Butterfinger cake
- Once the cake is fully chilled and set, spread the cream cheese Cool Whip frosting evenly over the top.
- Sprinkle the crushed Butterfinger topping generously all over the frosted cake. Press very lightly so they stick but don’t sink.
- If you’d like, drizzle a little caramel or chocolate sauce across the top in zigzags for a bakery-style look.
9. Chill again and serve
- Cover the finished cake and return it to the refrigerator for at least 30–60 minutes to let Everything set together.
- Slice into squares and serve cold. A little goes a long way, but watch how fast those pieces disappear.
This is one of those desserts where people casually say they’ll “just take a small piece,” and then they’re back in the kitchen trimming off “just a sliver” from the pan.
Servings & Timing
- Yield: About 12–16 servings, depending on how big you cut the slices
- Prep Time: 15–20 minutes
- Bake Time: 25–30 minutes
- Chill Time: 3–4 hours minimum (overnight preferred)
- Total Time: About 4–5 hours, mostly hands-off
For a party potluck cake, I usually cut this into 15 or 20 smaller squares because it’s rich and sweet, like a true butterfinger candy dessert.
Fun Variations on This Butterfinger Cake Recipe
If you like to play around in the kitchen a bit, here are some easy twists:
- Chocolate Butterfinger Cake: Use a chocolate cake mix instead of yellow for a deeper, fudgier chocolate candy dessert cake.
- Peanut Butter Version: Swirl a few tablespoons of melted peanut butter into the caramel-poke mixture or into the frosting.
- Extra Crunch Layer: Sprinkle half the crushed Butterfingers over the caramel layer before chilling, then the rest on top of the frosting.
- Lighter Frosting: Use sugar-free whipped topping and reduce the powdered sugar in the frosting to 1/2 cup for a slightly less sweet version.
- Different Candy Bar Cake: Try Snickers, Heath, or Reese’s instead of Butterfinger for a whole new candy bar cake experience.
- Mini Butterfinger Cupcakes: Turn this into a cupcake recipe—poke, fill, frost, and top each cupcake with crushed Butterfingers for individual treats.
You can see how flexible this is. Once you learn the basic caramel poke cake method, you can swap flavors pretty easily.
Storage, Freezing & Make-Ahead Tips
Because this is a refrigerated poke cake, it actually loves the fridge.
-
Fridge storage:
- Cover the cake tightly with plastic wrap or a lid and refrigerate.
- It keeps well for 3–4 days, though the candy topping will soften a bit over time.
-
Freezing:
- You can freeze the un-topped cake (after it’s been poked and soaked with caramel) for up to 2 months, wrapped tightly.
- Thaw overnight in the fridge, then frost with the Cool Whip mixture and add crushed Butterfingers before serving.
-
Freezing fully assembled cake:
- Possible, but the candy loses some crunch. If you do freeze it, wrap in two layers and thaw in the fridge.
-
Make-ahead advice:
- This is a perfect make-ahead dessert. Make it the night before a party so the creamy caramel layer really has time to settle.
- I often wait to add the crushed Butterfinger topping until a few hours before serving so it stays a little crisp.
Recipe Notes from My Kitchen
A few things I’ve learned over years of making this for school events, birthdays, and more than one Friday movie night:
- Don’t skip the chill time. The difference between a freshly poked cake and one that’s rested overnight is huge. Overnight gives you that velvety, spoon-tender texture that makes everyone go, “How is this so moist?”
- Warm cake, warm caramel mixture. Pouring the caramel-condensed milk mixture over a warm cake helps it soak evenly. If your caramel was in the fridge, let it sit out or warm it slightly so it pours smoothly.
- Go gentle with the poking. Too many holes or holes that are too big can make the cake fall apart when serving. A wooden spoon handle is just about perfect.
- Watch your sweetness level. This is a sweet dessert—no getting around it. If you’re sensitive to sweetness, you can:
- Use only 3/4 of the caramel-condensed milk mixture
- Add a pinch of salt to the frosting
- Use lightly sweetened whipped cream instead of Cool Whip and powdered sugar
- Serving tip: Run a knife under hot water, wipe it dry, and then slice the cake. It makes for cleaner cuts through the chilled layers.
- Traveling with it: If you’re bringing this Butterfinger cake to a potluck, keep it chilled in an insulated bag or cooler. It’s fine sitting out for an hour or two, but it’s happiest cold.
Butterfinger Cake Recipe FAQs
1. Can I use homemade whipped cream instead of Cool Whip?
Yes, you can use homemade whipped cream, but stabilize it with a tablespoon of instant vanilla pudding mix or a bit of cream cheese so it holds up as a frosting and doesn’t deflate.
2. Do I have to use yellow cake, or can I change the flavor?
You can absolutely use chocolate, butter, vanilla, or even a marble cake mix. Chocolate cake gives you a richer chocolate Butterfinger cake, while yellow cake tastes more old-fashioned.
3. My cake seems too soggy—what went wrong?
Most likely, too much of the caramel-condensed milk mixture pooled in one area, or you poured it on while the cake was piping hot. Next time, let the cake cool 10–15 minutes and pour slowly, spreading as you go.
4. Can I make this Butterfinger cake recipe gluten-free?
Yes—use a gluten-free yellow or chocolate cake mix and double-check that your caramel topping and candy bars are gluten-free. Many are, but always read the labels.
5. Can I reduce the sugar in this recipe?
You can cut the powdered sugar in the frosting to 1/2 cup and use less of the caramel-condensed milk mixture (about 3/4 of it), but it will still be a sweet dessert—just slightly less intense.
6. How far in advance can I make this for a party?
You can make it 24 hours ahead without any issue. If planning more than a day ahead, keep the cake and frosting separate, then frost and add the crushed Butterfingers the day you serve.
7. Will the Butterfinger topping stay crunchy?
It’s crunchiest the first day. After that, it softens a bit from the moisture in the frosting, but it still tastes wonderful—more like a fudgy, nutty candy layer.
8. Can I halve the recipe?
Yes, bake the cake in an 8×8 or 9×9-inch pan and reduce all ingredients by about half. Check the cake a little earlier, around 20–22 minutes, since smaller pans can bake faster.
Final Thoughts on This Butterfinger Cake Recipe
This Butterfinger Cake Recipe is one of those desserts that feels nostalgic and comforting, like something your favorite aunt would bring to every family gathering—simple ingredients, easy steps, and big, bold flavor. It’s a cool, creamy, caramel poke cake loaded with crushed Butterfinger topping that hits all the right notes: sweet, salty, crunchy, and soft.
If you try this candy bar cake, I’d love to hear how it went—tell me who you served it to, any little tweaks you made, and whether you went with yellow cake or chocolate. And if you’re in the mood for more easy Butterfinger dessert ideas or other poke cake recipes, keep exploring and have fun playing in the kitchen.
Butterfinger Cake
Ingredients
- 1 box yellow cake mix 15.25 oz; any brand such as Betty Crocker, Pillsbury, or Duncan Hines
- 3 large eggs or as directed on cake mix box
- 1/2 cup vegetable oil or as directed on cake mix box
- 1 cup water or milk for a richer cake; or as directed on cake mix box
- 1 can sweetened condensed milk 14 oz
- 1 jar caramel ice cream topping 12–14 oz; caramel sundae syrup or caramel topping
- 8 fun-size bars Butterfinger candy bars up to 10 fun-size bars, roughly crushed (about 1 1/2 to 2 cups pieces)
- 1 package cream cheese 8 oz, full-fat, softened to room temperature
- 1 cup powdered sugar sifted if lumpy
- 1 teaspoon vanilla extract pure vanilla extract
- 1 tub frozen whipped topping 8 oz Cool Whip, thawed in the refrigerator
- chocolate sauce or chocolate syrup optional, for drizzling on top
- additional caramel sauce optional, for drizzling on top
- flaky sea salt optional, a pinch on top to balance sweetness
Instructions
- Preheat your oven to 350°F (175°C). Lightly grease a 9×13-inch baking pan with nonstick spray or butter. Lining with parchment is optional for easier removal.
- In a large bowl, prepare the yellow cake mix according to the package directions, using the eggs, oil, and water (or milk for a richer cake). Beat with a hand mixer or whisk for about 2 minutes, until the batter is smooth and no dry streaks remain.1 box yellow cake mix, 3 large eggs, 1/2 cup vegetable oil, 1 cup water
- Pour the batter into the prepared 9×13-inch pan and spread it evenly. Bake for 25–30 minutes, or until the top is golden and a toothpick inserted in the center comes out clean. The cake should spring back lightly when tapped in the center.
- Place the pan on a wire rack and let the cake cool for 10–15 minutes; it should be warm but not hot. Using the handle of a wooden spoon, a chopstick, or the thick end of a butter knife, poke holes all over the cake about 1 inch apart, going almost to the bottom without tearing the cake.
- In a medium bowl or large measuring cup, whisk together the sweetened condensed milk and caramel ice cream topping until completely smooth.1 can sweetened condensed milk, 1 jar caramel ice cream topping
- Slowly pour the caramel–condensed milk mixture evenly over the warm, poked cake, taking your time so it seeps into the holes rather than running to the edges. Use the back of a spoon or an offset spatula to gently spread and nudge the mixture into the holes.
- Let the cake cool completely to room temperature, then cover it tightly with plastic wrap. Refrigerate for at least 3 hours, or preferably overnight, to allow the caramel layer to soak in and set.
- In a medium bowl, beat the softened cream cheese with a mixer until smooth and creamy. Add the powdered sugar and vanilla extract and beat again until fluffy and well combined. Gently fold in the thawed whipped topping with a spatula just until no streaks remain, keeping the mixture light and airy.1 package cream cheese, 1 cup powdered sugar, 1 teaspoon vanilla extract, 1 tub frozen whipped topping
- Place the Butterfinger candy bars in a zip-top bag. Use a rolling pin, heavy pan, or your hands to crush them into a mixture of fine crumbs and small chunks for good texture.8 fun-size bars Butterfinger candy bars
- Once the cake is fully chilled and set, remove the plastic wrap. Spread the cream cheese–Cool Whip frosting evenly over the top of the cake. Sprinkle the crushed Butterfinger pieces generously over the frosting, pressing very lightly so they adhere without sinking.
- If desired, drizzle caramel sauce and/or chocolate sauce over the top in a zigzag pattern. Sprinkle with a pinch of flaky sea salt to balance the sweetness, if you like. Cover the cake again and refrigerate for 30–60 minutes before serving to let everything set.chocolate sauce or chocolate syrup, additional caramel sauce, flaky sea salt
- Slice the chilled cake into squares and serve cold. For cleaner cuts, run a knife under hot water, wipe it dry, and then slice. Store leftovers covered in the refrigerator.