Would you like to save this?
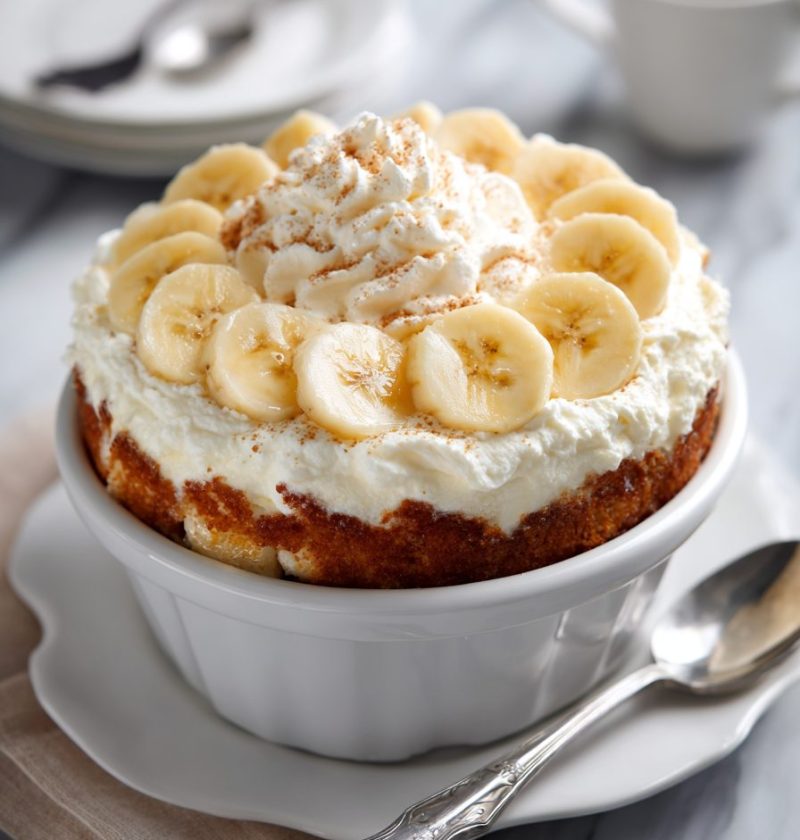
Magnolia Bakery Banana Pudding Recipe
If you’ve been craving that famous New York bakery banana pudding but don’t live anywhere near the city, this Magnolia Bakery Banana Pudding Recipe is your creamy, dreamy, no-bake answer—perfect for potlucks, holidays, or honestly, a random Tuesday night.
This version is my warm, homey, copycat Magnolia Bakery recipe that brings the magic of that iconic magnolia bakery dessert straight into your kitchen. It’s a classic banana pudding dessert: fluffy vanilla pudding, clouds of whipped cream, soft vanilla wafer cookies, and layers of ripe bananas that get even better as they sit. I love making this when the weather heats up and I refuse to turn on the oven, or around the holidays when I need a crowd-pleasing dessert I can prep ahead without fuss.
If you’ve ever stood in that long line at a New York bakery for their famous banana pudding, you know exactly why it has a fan club. But you know what? You can get that same flavor and texture at home, with simple grocery store ingredients and a little patience while it chills. This homemade banana pudding is cool, comforting, and nostalgic, like something Grandma might have made—just dressed up a little.
And yes, this is a true layered banana pudding, built in a glass Trifle dish (or even a simple 9×13 pan) so you can see every pretty layer of cookies, bananas, and creamy filling. It’s the dessert that makes people lean over the table and say, “Who made this?”

Why You’ll Love This Magnolia Bakery Banana Pudding Recipe
- No-bake dessert perfection – No oven, no fuss; this banana pudding recipe lives in your fridge, not your oven.
- Tastes just like the famous banana pudding – A true copycat Magnolia Bakery recipe, with the same pillowy, mousse-like texture.
- Feeds a crowd – Ideal for big family get-togethers, potlucks, and church suppers; people go back for seconds (and thirds).
- Make-ahead friendly – It actually tastes better after resting, so you can prep it the night before and relax.
- Simple grocery store ingredients – Nothing fancy: instant pudding, sweetened condensed milk, heavy cream, bananas, and vanilla wafers.
- Kid-approved and adult-obsessed – The flavor hits that nostalgic, vanilla wafer banana pudding note that everyone loves.
- Flexible for serving – Serve it in a big trifle bowl, a 9×13 dish, or scoop it into individual cups or jars for parties.
- Easy to customize – Turn it into a chocolate twist, Nutella swirl, or lighter version without losing the charm of the original.
What Makes This Magnolia Bakery Banana Pudding So Special?
Let me explain what makes this particular Magnolia Bakery Banana Pudding Recipe different from the average pudding mix-and-go dessert.
First, it starts with a base of instant vanilla pudding, but we don’t just follow the box. We whisk it with cold water and a whole can of sweetened condensed milk. That’s what gives this homemade banana pudding its rich, silky sweetness—without feeling heavy like a traditional cooked custard.
Then, after that pudding base chills and thickens, we fold in a mountain of softly whipped heavy cream. That step is crucial. It changes the texture from simple pudding to a light, mousse-like filling that honestly feels a bit fancy, even though it’s very easy. It’s the hallmark of the Magnolia Bakery banana pudding everyone raves about: fluffy, airy, and not too dense.
From there, it becomes a layered banana pudding: vanilla wafers on the bottom, fresh banana slices, a layer of pudding cream, and repeat. The cookies soak up just enough moisture to soften into cake-like bites, but they still hold some structure if you time it right. The bananas mingle with the vanilla, and everything settles into this dreamy, almost trifle-like dessert.
I like to serve this as a special magnolia bakery dessert when friends visit from out of town. We’ll sit on the porch with big spoonfuls of pudding, swapping stories. There’s something about banana pudding that feels like a conversation dessert—slow, cozy, and fun.
And if you’re wondering, “Is it worth making at home instead of buying it?” Absolutely. You control the ingredients, adjust the sweetness, choose your favorite cookies, and build it in whatever dish matches your occasion. Plus, no plane ticket to New York required.
Ingredients for Magnolia Bakery Banana Pudding Recipe
Here’s everything you need to make this famous banana pudding at home. I’ll list the classic version first, then I’ll share a few simple swaps you can try.
Pudding Base
- 1 (14-ounce) can sweetened condensed milk
(This gives that signature sweetness and silky texture. Don’t skip it.) - 1 ½ cups cold water
(Very cold; this helps the pudding set up properly.) - 1 (3.4-ounce) box instant vanilla pudding mix
(Use instant, not cook-and-serve. Brands like Jell-O work great.)
Whipped Cream Layer
- 3 cups heavy whipping cream, chilled
(Cold cream whips better and holds its shape longer.) - 1–2 teaspoons pure vanilla extract
(Optional but lovely; boosts the vanilla flavor in this classic banana pudding dessert.)
Layers
- 1 (11–12-ounce) box vanilla wafers
(Nilla Wafers are the classic choice for vanilla wafer banana pudding, but store brands work too.) - 4–5 medium ripe bananas, sliced
(Use bananas with yellow peels and light brown freckles—sweet but not mushy.)
Optional Garnishes
- Extra crushed vanilla wafers for topping
- A sprinkle of ground cinnamon or nutmeg
- Shaved white chocolate or a drizzle of caramel for a “fancy bakery” touch
Ingredient Tips & Easy Substitutions
- Pudding mix – If you can’t find vanilla, French vanilla or banana cream pudding works. Banana cream will give a stronger banana flavor.
- Sweetened condensed milk – There’s no perfect substitute for this, but low-fat versions work if you want it a bit lighter.
- Heavy cream – You can use whipping cream instead of heavy cream; just make sure it’s labeled for whipping.
- Dairy-free version – Use coconut cream for whipping and a dairy-free condensed milk alternative, plus a plant-based pudding mix and cookies. The texture will be slightly different but still lovely.
- Cookies – You can swap in shortbread cookies, graham crackers, or even butter cookies for a twist on the classic New York bakery banana pudding vibe.
Step-by-Step Directions
This banana pudding recipe is very forgiving, but the chilling times matter. Here’s how to get that perfect, Magnolia-style texture.
1. Make the Pudding Base
-
Whisk the condensed milk and cold water.
In a medium mixing bowl, whisk together the sweetened condensed milk and cold water until fully combined and smooth. -
Add the instant pudding mix.
Sprinkle the instant vanilla pudding mix over the milk mixture. Whisk well for 1–2 minutes, until no dry spots remain and it starts to thicken slightly. -
Chill the pudding.
Cover the bowl with plastic wrap and refrigerate for at least 1–2 hours, or until very thick and completely chilled.
Tip: Don’t rush this—if the pudding base isn’t thick, your final banana pudding will be too loose.
2. Whip the Cream
-
Whip the heavy cream.
In a large, cold mixing bowl (metal is great for this), add the heavy cream. Using a hand mixer or stand mixer with the whisk attachment, beat on medium-high speed until soft peaks form. -
Add vanilla and continue beating.
Add vanilla extract, then beat just until you reach medium-stiff peaks. The cream should be billowy and hold its shape, but still look smooth—don’t overbeat or it’ll turn grainy.
3. Fold Pudding and Cream Together
-
Combine the mixtures.
Take the chilled pudding base out of the fridge. Gently loosen it with a whisk if it’s very firm. -
Fold in the whipped cream.
Using a spatula, gently fold the whipped cream into the pudding in 2–3 additions. Work slowly, cutting down and lifting up with the spatula, so you don’t deflate the cream.
You’re aiming for a light, airy, mousse-like texture—this is the heart of Magnolia Bakery banana pudding.
4. Slice the Bananas
- Prep the bananas right before layering.
Peel and slice the bananas into ¼-inch rounds.
Tip: Don’t slice the bananas too far ahead of time; they’ll brown. If you need to, you can toss them very lightly in lemon juice, but use a tiny amount so the flavor doesn’t stand out.
5. Layer the Banana Pudding
You can make this famous banana pudding in a large glass trifle bowl, a 9×13 dish, or individual cups.
-
First cookie layer.
Place a layer of vanilla wafers on the bottom of your serving dish. They don’t have to be perfect—small gaps are fine. -
Add banana slices.
Place a generous layer of banana slices over the cookies. -
Spoon on the cream mixture.
Spread about ⅓ of the pudding-cream mixture over the bananas in an even layer, making sure everything is covered. -
Repeat the layers.
Continue layering: cookies, bananas, pudding mixture, until you’ve used everything. Aim for at least two full layers; three is even prettier for a layered banana pudding. -
Finish with pudding and cookie crumbs.
End with a layer of the pudding mixture on top. Sprinkle with a handful of crushed vanilla wafers for a classic look.
6. Chill Before Serving
- Refrigerate.
Cover the dish tightly with plastic wrap and refrigerate for at least 4 hours, but 6–8 hours (or overnight) is best.
As it chills, the vanilla wafers soften into a cake-like layer, the bananas infuse the cream with flavor, and everything settles into that classic, spoonable Magnolia Bakery banana pudding experience.
Servings & Timing
- Yield: About 10–12 servings (depending on portion size and dish used)
- Prep Time: 25–30 minutes active time
- Chill Time (Pudding Base): 1–2 hours
- Chill Time (Assembled Dessert): 4–8 hours (or overnight)
- Total Time: About 6–10 hours, mostly chilling time
I know, that sounds like a lot, but most of it is hands-off. It’s the perfect “make it earlier in the day and forget about it” kind of dessert.
Easy Variations on Magnolia Bakery Banana Pudding
Once you’ve nailed the base Magnolia Bakery Banana Pudding Recipe, you can play around a bit. Here are a few fun twists:
- Chocolate Banana Pudding: Use chocolate wafers or chocolate graham crackers and swirl in ¼ cup melted, cooled chocolate into the pudding mixture.
- Strawberry-Banana Pudding: Add a layer of sliced fresh strawberries along with the bananas, for a spring and summer version.
- Peanut Butter Banana Pudding: Gently fold ¼–⅓ cup creamy peanut butter into the finished cream mixture for a subtle PB flavor.
- Lightened-Up Version: Use light sweetened condensed milk and fold in 1–2 cups of light whipped topping along with real whipped cream.
- Salted Caramel Banana Pudding: Drizzle caramel sauce and a pinch of flaky sea salt between layers for a more decadent magnolia bakery dessert feel.
- Gluten-Free Banana Pudding: Use gluten-free vanilla wafer cookies; everything else is naturally gluten-free (check labels to be safe).
How to Store & Serve This Banana Pudding
You know what? This is one of those desserts that’s almost better after a rest. Here’s how to keep it tasting fresh.
Storing in the Fridge
- Fridge: Cover tightly with plastic wrap or a lid and store in the refrigerator.
- Shelf Life: Best eaten within 2 days. By day 3, the bananas will likely brown and the wafers can get a little too soft.
- Serving: Serve straight from the fridge; it’s meant to be cold and creamy.
Freezer Notes
I don’t recommend freezing this Magnolia Bakery banana pudding. The bananas turn mushy and the creamy texture becomes icy. It’s one of those desserts that’s really meant for the fridge.
Make-Ahead Tips
- Day Before Serving: This is ideal. Assemble the whole dessert, cover, and chill overnight. The flavors meld and the cookies soften just enough.
- Same-Day Prep: If you’re short on time, aim for at least 4 hours of chill time after assembling.
- Last-Minute Garnish: Add any extra cookie crumbs or decorative toppings shortly before serving, so they stay crunchy and pretty.
Notes from My Kitchen (Little Things That Matter)
- Bananas matter. If they’re too green, the flavor is flat; too brown, and they turn mushy and strong. You want that sweet spot with a few freckles.
- Don’t skimp on the chill. I know it’s tempting to spoon into it right away, but the famous banana pudding texture happens while it rests.
- Layer generously. When in doubt, add more bananas. People always go looking for that banana in each bite.
- Use a glass dish when you can. It’s not required, but seeing the pretty layers of this layered banana pudding through the glass makes it feel special.
- Taste the cream mixture. Before assembling, taste and adjust the vanilla. If you like a stronger vanilla flavor, add a little more extract.
- For a smaller batch: Halve the recipe and assemble it in a loaf pan or small casserole dish. Same flavor, less temptation.
Sometimes when I’m making this for just the two of us (empty nest life has its perks), I’ll split it into a few mason jars. They look cute, and it keeps us from eating, well, half a trifle dish in one night.
Frequently Asked Questions
1. Can I use cook-and-serve pudding instead of instant?
No—instant pudding is key here. Cook-and-serve pudding sets differently and won’t give the same light, fluffy texture this copycat Magnolia Bakery recipe is known for.
2. How do I keep the bananas from turning brown?
Slice them right before layering, and make sure they’re fully covered by the pudding mixture. If you like, you can very lightly brush them with lemon juice, but use a tiny amount so the flavor doesn’t stand out.
3. Can I make Magnolia Bakery banana pudding two days ahead?
You can, but I recommend 24 hours or less for the best texture. By day two, it’s still tasty, but the wafers are much softer and the bananas may start browning.
4. What brand of vanilla wafers works best?
Classic Nilla Wafers are the go-to for that authentic New York bakery banana pudding feel, but store brands usually work just fine. Some are a bit crunchier, which can actually be nice after they soften.
5. My pudding mixture came out too runny—what happened?
Most likely, the pudding base didn’t chill long enough before you folded in the cream, or too much water was added. Always let that base get thick and cold, and measure carefully.
6. Can I use frozen bananas?
I don’t recommend it. Thawed bananas are very soft and watery, and they’ll affect the texture of your homemade banana pudding.
7. Is this Magnolia Bakery Banana Pudding Recipe very sweet?
It’s sweet, yes—similar to the original magnolia bakery dessert. If you prefer it less sweet, you can use a bit less sweetened condensed milk or add a small pinch of salt to the pudding mixture to balance the flavor.
8. Can I use Cool Whip instead of whipped cream?
You can use it for part of the cream, but I don’t suggest using only Cool Whip. A mix of real whipped cream and some whipped topping keeps it closer to the classic flavor and texture.
Wrapping It Up: Your New Go-To Banana Pudding
This Magnolia Bakery Banana Pudding Recipe brings everything you love about that famous banana pudding into your home kitchen—no travel, no lines, just a big spoon and a chilled dish of creamy, cloud-like layers. It’s a simple, no-bake dessert that feels special enough for holidays but easy enough for Sunday dinner.
If you make this classic banana pudding dessert, I’d love to hear how it turns out. Did your family fight over the last spoonful? Did you try any fun variations? Leave a comment, share a photo, or next time, try pairing it with another no-bake treat like a chocolate icebox cake or a simple berry trifle.
Now go grab your whisk and your vanilla wafers—this famous banana pudding won’t make itself.
Magnolia Bakery Banana Pudding
Ingredients
- 1 can (14 oz) sweetened condensed milk
- 1 1/2 cups cold water very cold
- 1 box (3.4 oz) instant vanilla pudding mix use instant, not cook-and-serve
- 3 cups heavy whipping cream chilled
- 1-2 teaspoons pure vanilla extract optional, to taste
- 1 box (11–12 oz) vanilla wafers such as Nilla Wafers
- 4-5 medium ripe bananas sliced into 1/4-inch rounds
- extra vanilla wafers crushed, for topping (optional)
- ground cinnamon or nutmeg for garnish (optional)
- shaved white chocolate or caramel sauce for garnish (optional)
Instructions
- In a medium mixing bowl, whisk together the sweetened condensed milk and cold water until fully combined and smooth. Sprinkle the instant vanilla pudding mix over the milk mixture and whisk well for 1–2 minutes, until no dry spots remain and it starts to thicken slightly.1 can (14 oz) sweetened condensed milk, 1 1/2 cups cold water, 1 box (3.4 oz) instant vanilla pudding mix
- Cover the bowl with plastic wrap and refrigerate for at least 1–2 hours, or until very thick and completely chilled.
- In a large, cold mixing bowl, add the heavy whipping cream. Using a hand mixer or stand mixer with the whisk attachment, beat on medium-high speed until soft peaks form. Add the vanilla extract, then continue beating just until medium-stiff peaks form. Do not overbeat.3 cups heavy whipping cream, 1-2 teaspoons pure vanilla extract
- Remove the chilled pudding base from the refrigerator and gently loosen it with a whisk if very firm. Using a spatula, fold the whipped cream into the pudding in 2–3 additions, cutting down and lifting up gently to keep the mixture light and airy.
- Just before assembling, peel and slice the bananas into 1/4-inch rounds. If desired, you may very lightly toss them with a small amount of lemon juice to slow browning, but use only a tiny amount so the flavor doesn’t stand out.4-5 medium ripe bananas
- In a large glass trifle dish, a 9x13-inch dish, or individual cups, place a layer of vanilla wafers on the bottom. Small gaps are fine.1 box (11–12 oz) vanilla wafers
- Add a generous layer of banana slices over the wafers. Spoon about one-third of the pudding-cream mixture over the bananas and spread into an even layer, making sure the bananas are fully covered.4-5 medium ripe bananas
- Repeat the layers—vanilla wafers, bananas, pudding mixture—until you have used all of the components, aiming for at least two full layers and up to three, depending on your dish. Finish with a layer of the pudding mixture on top.1 box (3.4 oz) instant vanilla pudding mix, 3 cups heavy whipping cream, 1-2 teaspoons pure vanilla extract, 1 box (11–12 oz) vanilla wafers, 4-5 medium ripe bananas
- Sprinkle the top with crushed vanilla wafers and, if desired, a light dusting of ground cinnamon or nutmeg. Add shaved white chocolate or a drizzle of caramel for a fancier presentation, if you like.extra vanilla wafers, ground cinnamon or nutmeg, shaved white chocolate or caramel sauce
- Cover the dish tightly with plastic wrap and refrigerate for at least 4 hours, and preferably 6–8 hours or overnight, until the wafers have softened and the dessert is fully chilled. Serve cold straight from the refrigerator.