Would you like to save this?
Grinch Fudge Recipe
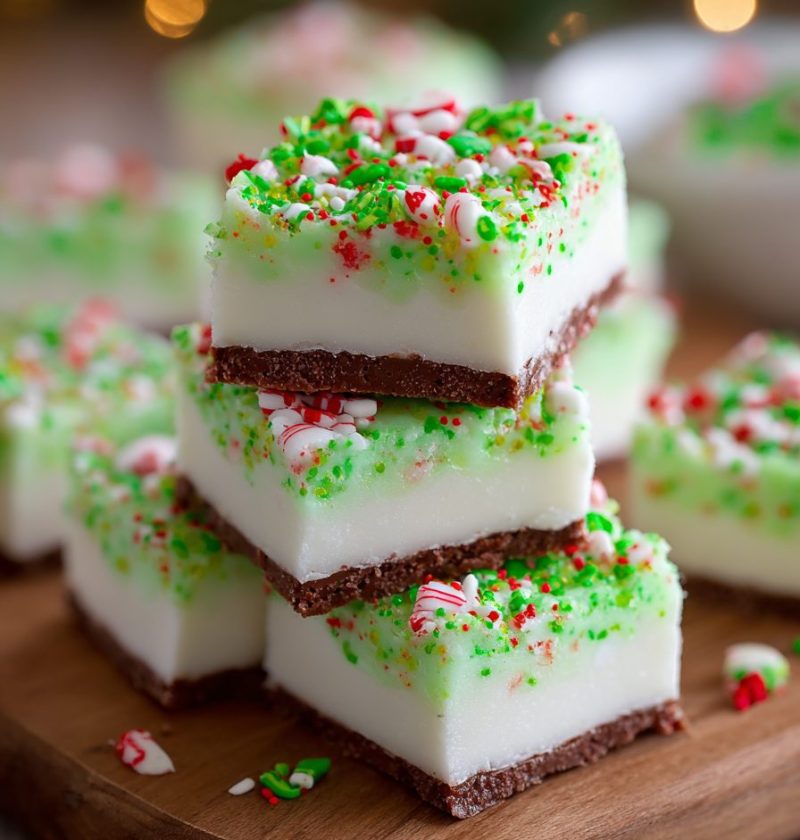
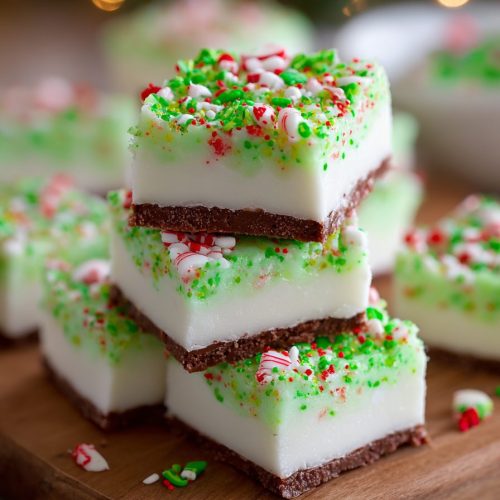
This Grinch Fudge Recipe is a cheerful, no-bake Christmas Fudge Recipe made with creamy white chocolate, marshmallow fluff, and a festive green color topped with tiny red hearts—sweet, simple, and perfect for holiday fudge dessert trays.
Full Recipe Introduction
Every December, without fail, my kitchen turns into what my kids call “Grandma’s candy workshop.” This Grinch Fudge Recipe is one of those holiday fudge desserts that has quickly moved from “new idea” to “must-make every year.”
If you haven’t met Grinch fudge yet, think of it as a playful twist on classic white chocolate fudge. It’s a green fudge candy that’s silky, rich, and studded with little red heart sprinkles—just like the Grinch’s heart growing three sizes. It’s a fun Christmas Fudge Recipe that kids adore, but adults quietly go back for seconds too.
What I love most is how approachable it is. This is a stovetop fudge recipe that doesn’t need a candy thermometer and doesn’t require any fancy pastry skills. You melt, stir, pour, chill. That’s it. It’s the kind of Christmas candy recipe you can make on a weeknight after work, or on a Saturday afternoon with little helpers who are mostly there to lick the spoon.
Is it “healthy”? Well, let’s be honest—this is a holiday dessert. But you know what? It’s made with simple, pantry-friendly ingredients, and you control the portion size. One small square really does go a long way because the white chocolate fudge base is so rich and satisfying.
I love serving this Grinch themed dessert on Christmas Eve alongside hot cocoa, adding it to cookie platters for neighbors, or tucking a few pieces into little tins as teacher gifts. It also makes a gorgeous, kid friendly fudge centerpiece on a Christmas party dessert table—people see that bright green color and can’t help but smile.
So, grab a saucepan, put on “How the Grinch Stole Christmas,” and let’s make a Christmas dessert recipe that feels as whimsical as the holiday itself.
Why You’ll Love This Grinch Fudge Recipe
-
Kid-approved and fun
Little hands love the bright green color and the red heart sprinkles—and they can help with most steps. -
No oven needed
This easy holiday treat is made completely on the stovetop; your oven is free for cookies, pies, and ham. -
Short ingredient list
Just a few simple ingredients you probably already have for holiday baking: white chocolate, sweetened condensed milk, marshmallow fluff. -
Fool-friendly method
No candy thermometer, no softball stage—this marshmallow fluff fudge is forgiving and beginner-friendly. -
Perfect make-ahead treat
It needs time to chill, so you can make it a day or two ahead for Christmas parties or gift boxes. -
Great for gift giving
This holiday fudge dessert packs beautifully in tins or cellophane bags and holds its shape well. -
Customizable
You can add crushed candy canes, flavor extracts, or change up the sprinkles for different festive Christmas sweets. -
Crowd-pleasing flavor
Creamy, vanilla-scented white chocolate fudge that melts in your mouth—no strange aftertaste or waxy texture.
Ingredients
You don’t need anything fancy for this Grinch fudge recipe, but the quality of your ingredients does matter a bit. Here’s what you’ll need:
For the fudge:
- 3 cups white chocolate chips (about 18 ounces; choose a good brand like Ghirardelli or Guittard for the smoothest texture)
- 1 can (14 ounces) sweetened condensed milk (NOT evaporated milk)
- 4 tablespoons unsalted butter, cut into chunks (room temperature melts more evenly)
- 1 cup marshmallow fluff or marshmallow creme (this helps create that smooth, creamy, marshmallow fluff fudge texture)
- 1 teaspoon pure vanilla extract (adds cozy, round flavor to the white chocolate fudge)
- 1/4 teaspoon fine sea salt (balances the sweetness; don’t skip)
- Green gel food coloring, about 6–10 drops (gel works better than liquid and keeps the fudge from getting too soft)
For topping:
- 1/3 cup red heart sprinkles or candy hearts
- If you can’t find heart sprinkles, red jimmies or red sanding sugar still give a fun Grinch-themed dessert look.
Pan prep:
- Nonstick spray or a little extra butter, for greasing
- Parchment paper, for lining the pan (so your fudge lifts out cleanly)
Ingredient tips:
- White chocolate: Real white chocolate chips made with cocoa butter melt smoother than “white baking chips.” Check the label if you can.
- Sweetened condensed milk: This is the backbone of the recipe. It gives structure and sweetness, so don’t try to swap this with regular milk.
- Butter: You can use salted butter and skip the added salt; just taste the mixture before you pour it in the pan.
- Food coloring: Start with a few drops, stir, then add more. You want Grinchy green, not neon highlighter—unless your kids insist.

Directions
This Christmas fudge recipe uses the stovetop, which gives you a little more control than a microwave. If you can stir, you can make this.
-
Prep your pan
Lightly grease an 8×8-inch baking pan with butter or nonstick spray.
Line it with parchment paper, leaving an overhang on two sides so you can lift the fudge out later. Smooth down the corners so the parchment lies flat. -
Set up your ingredients
Measure the white chocolate chips, butter chunks, and sweetened condensed milk before you start heating.
Have the marshmallow fluff, vanilla extract, salt, and food coloring nearby. This mixture moves fast once it’s hot, so being ready avoids scrambling. -
Melt the white chocolate base
In a medium, heavy-bottomed saucepan, add the white chocolate chips, sweetened condensed milk, and butter.
Place the pan over low to medium-low heat. Stir constantly with a heatproof spatula or wooden spoon as everything melts together.
You want the mixture smooth and glossy. If you see any tiny lumps, keep stirring gently. Don’t crank the heat up; white chocolate scorches easily. -
Add the marshmallow fluff
Once the mixture is completely smooth, remove the pan from the heat.
Immediately add the marshmallow fluff, vanilla extract, and salt.
Stir until the marshmallow is fully incorporated and the fudge base is thick and uniform. It will look a little like soft frosting at this stage. -
Color it Grinch green
Add a few drops of green gel food coloring and stir well.
Keep adding a drop or two at a time until you reach your favorite Grinchy shade—somewhere between light lime and vivid green.
Remember, the color will look slightly lighter once it’s chilled and sliced. -
Pour and smooth
Quickly pour the warm green fudge mixture into your prepared pan.
Use your spatula to spread it into an even layer, pushing it gently into the corners. Tap the pan on the counter a couple of times to pop air bubbles. -
Add the red hearts
While the fudge is still warm and soft on top, generously sprinkle the red heart sprinkles all over the surface.
Press them very gently with clean fingers or the back of a spoon so they adhere but don’t sink too far in. You want those hearts front and center. -
Chill until firm
Let the pan cool at room temperature for about 20–30 minutes. Then transfer it to the refrigerator.
Chill for at least 2 hours, or until the fudge is completely firm when touched in the center. For cleaner slices, 3–4 hours (or overnight) is even better. -
Slice and serve
Use the parchment overhang to lift the fudge out of the pan and place it on a cutting board.
With a sharp knife, cut into 36 small squares (6 by 6) or any size you like. Wipe the knife between cuts for neat edges.
Serve on a pretty platter as a Christmas party dessert, or pack into tins as an easy holiday treat. -
Enjoy and share
This is the fun part. Serve your Grinch fudge with hot cocoa, coffee, or a glass of cold milk.
Watch kids’ eyes light up when they see those tiny red hearts on the bright green fudge candy.
Servings & Timing
- Yield: About 36 small squares of fudge
- Prep Time: 15 minutes
- Cook Time: 5–8 minutes on the stovetop
- Chill Time: 2–4 hours, depending on how firm you like it
- Total Time: About 2 hours 30 minutes to 4 hours (mostly hands-off chilling time)
If you’re making this for a Christmas party, I suggest prepping it the day before so you’re not waiting on it to firm up when guests arrive.
Variations
You know what? Once you’ve got the basic Grinch fudge recipe down, you can have a lot of fun with it.
-
Peppermint Grinch Fudge
Add 1/2 teaspoon peppermint extract with the vanilla and sprinkle crushed candy canes on top with the hearts for a minty Christmas candy recipe. -
Grinch Swirl Fudge
Reserve 1/2 cup of the white fudge mixture before adding color, then swirl it over the green base with a toothpick for a marbled look. -
Extra Marshmallow Fudge
Fold in 1 cup of mini marshmallows after you color the fudge for extra pockets of chewy sweetness. -
Nutty Holiday Fudge
Stir in 3/4 cup finely chopped toasted pecans or walnuts before pouring into the pan; still festive, just a little more grown-up. -
Gluten-Free Friendly Version
Most ingredients here are naturally gluten-free, but double-check your sprinkles and white chocolate chips labels to be safe. -
Grinch Fudge Bars
Press a thin layer of crushed vanilla sandwich cookies mixed with a little melted butter into the pan first, then spread the fudge over it for a cookie crust.
Storage & Reheating
Fudge doesn’t really need reheating, but it does benefit from good storage, especially during busy holiday baking weeks.
Room temperature:
- Store the fudge in an airtight container at cool room temperature for up to 3–4 days.
- Place parchment or wax paper between layers to keep pieces from sticking together.
- If your kitchen runs warm, the fridge may be a better plan.
Refrigerator:
- Keep in an airtight container for up to 2 weeks.
- Let pieces sit at room temperature for about 10–15 minutes before serving so the texture softens slightly and tastes creamier.
Freezer:
- For longer storage, place fudge squares in a single layer on a baking sheet and freeze until solid.
- Transfer to a freezer-safe bag or container with parchment between layers.
- Freeze for up to 2–3 months.
- Thaw in the fridge overnight, then bring to room temperature for the best texture.
Make-ahead advice:
This Grinch themed dessert is perfect for making ahead of a busy Christmas week. I often make a batch the weekend before Christmas, freeze half, and keep half in the fridge for holiday nibbling and last-minute gifting.
Notes
After a few rounds of testing (and yes, a few not-so-pretty pans of fudge), here’s what I learned and what might help you:
-
Low and slow is your friend
White chocolate can be fussy. Keep the heat low and stir often. If the mixture gets grainy or looks oily, it’s usually a sign the heat was a bit too high. -
Use the right pan
A heavy-bottomed saucepan distributes heat more evenly and helps prevent scorching. Thin metal pans heat too quickly and can cause hot spots. -
Don’t skip the salt
It seems tiny, but that quarter teaspoon of salt really rounds out the sweetness and makes this Christmas fudge recipe taste more balanced. -
Food coloring matters
Gel colors are more concentrated and won’t water down your fudge. Liquid food coloring can sometimes make the mixture a bit softer, especially if you use a lot. -
Cut when cold, serve slightly soft
The fudge slices best when it’s cold from the fridge, but it tastes best once it warms slightly. If you’re serving guests, cut in advance and let it sit out for a bit. -
Sprinkles timing
Add the red hearts while the fudge is still warm on top; if you wait too long, they won’t stick. If they sink too deeply, your mixture might be a bit too hot.
And a small personal note: my grandkids love placing the red hearts “just so”—one in the middle of each future square. It takes a little longer, but it looks adorable and makes them feel so proud.
FAQs
Can I make this Grinch fudge recipe in the microwave instead of on the stovetop?
Yes. Melt the white chocolate chips, sweetened condensed milk, and butter together in a microwave-safe bowl in 20–30 second bursts, stirring well between each, until smooth. Then follow the rest of the steps as written.
My fudge didn’t set—what went wrong?
Usually, this means the mixture wasn’t heated long enough or had too much liquid. Chill it longer first; if it’s still soft, you can re-melt it gently with a small handful of extra white chocolate chips and re-pour.
Can I use candy melts instead of white chocolate chips?
You can, but the flavor and texture will be a bit different—candy melts are more like coating chocolate. For the best holiday fudge dessert flavor, real white chocolate chips are worth it.
Is this recipe safe for people with nut allergies?
The base recipe doesn’t use nuts, but always check labels for “may contain” warnings and choose sprinkles and chocolate made in nut-free facilities if needed.
How far ahead can I make this for a Christmas party dessert table?
You can make it up to a week ahead and keep it in an airtight container in the fridge. Slice it the day of the event for the cleanest cubes.
Can I double this recipe?
Yes. Use a 9×13-inch pan for a double batch. Make sure you use a large, heavy saucepan, and stir constantly so the mixture heats evenly.
Do I have to use marshmallow fluff?
Marshmallow fluff helps give this white chocolate fudge a soft, creamy texture. You can leave it out, but the fudge will be a bit firmer and slightly less pillowy.
Can I use food coloring drops instead of gel?
You can, but start with just a few and add slowly so you don’t add too much liquid. The color may be softer, but it will still look festive.
Conclusion
This Grinch Fudge Recipe brings together everything I love about holiday baking: playful color, nostalgic white chocolate fudge flavor, and a process simple enough that kids can jump right in. It’s an easy holiday treat that feels special, looks adorable on a Christmas dessert table, and makes a sweet, thoughtful gift.
If you try this Christmas fudge recipe, I’d love to hear how it went—leave a comment, tell me who you shared it with, or share your own fun twists. And if you’re building a full tray of festive Christmas sweets, you might also enjoy pairing this with classic peppermint bark or hot chocolate fudge for a holiday candy spread that’ll make even the Grinch smile.
Grinch Fudge
Ingredients
- 3 cups white chocolate chips about 18 ounces; use a good-quality brand for best texture
- 14 ounces sweetened condensed milk 1 can; NOT evaporated milk
- 4 tablespoons unsalted butter cut into chunks; room temperature melts more evenly
- 1 cup marshmallow fluff or marshmallow creme
- 1 teaspoon pure vanilla extract
- 1/4 teaspoon fine sea salt
- green gel food coloring about 6–10 drops, to desired shade
- 1/3 cup red heart sprinkles or candy hearts; or use red jimmies/sanding sugar if hearts aren’t available
- nonstick spray or butter for greasing the pan
- parchment paper for lining the pan
Instructions
- Lightly grease an 8×8-inch baking pan with butter or nonstick spray. Line with parchment paper, leaving an overhang on two sides to lift the fudge out later. Smooth the parchment so it lies flat in the corners.nonstick spray or butter, parchment paper
- Measure the white chocolate chips, butter chunks, and sweetened condensed milk before heating. Have the marshmallow fluff, vanilla extract, salt, and food coloring nearby so you can work quickly once the mixture is hot.3 cups white chocolate chips, 14 ounces sweetened condensed milk, 4 tablespoons unsalted butter, 1 cup marshmallow fluff, 1 teaspoon pure vanilla extract, 1/4 teaspoon fine sea salt, green gel food coloring
- In a medium, heavy-bottomed saucepan, combine the white chocolate chips, sweetened condensed milk, and butter. Place over low to medium-low heat and stir constantly until completely melted, smooth, and glossy. Do not increase the heat; white chocolate scorches easily.3 cups white chocolate chips, 14 ounces sweetened condensed milk, 4 tablespoons unsalted butter
- Remove the pan from the heat. Immediately add the marshmallow fluff, vanilla extract, and fine sea salt. Stir until fully incorporated and the mixture is thick, smooth, and uniform, similar to soft frosting.1 cup marshmallow fluff, 1 teaspoon pure vanilla extract, 1/4 teaspoon fine sea salt
- Add several drops of green gel food coloring and stir well. Continue adding a drop or two at a time, stirring between additions, until you reach your desired Grinchy shade of green. Keep in mind the color will appear slightly lighter once chilled.green gel food coloring
- Quickly pour the warm green fudge mixture into the prepared pan. Use a spatula to spread it into an even layer and push it into the corners. Tap the pan gently on the counter to remove any air bubbles.
- While the surface is still warm and soft, generously sprinkle red heart sprinkles evenly over the top. Press them very gently so they adhere without sinking too deeply.1/3 cup red heart sprinkles
- Let the pan cool at room temperature for 20–30 minutes, then transfer to the refrigerator. Chill for at least 2 hours, or 3–4 hours (or overnight) for firmer, cleaner slices.
- Use the parchment overhang to lift the fudge from the pan onto a cutting board. With a sharp knife, cut into about 36 small squares (6 by 6) or your desired size, wiping the knife between cuts for neat edges.
- Serve the Grinch fudge on a platter or pack into tins or gift boxes. Pair with hot cocoa, coffee, or milk, and enjoy.