Would you like to save this?
Boston Cream Pie Bars Recipe
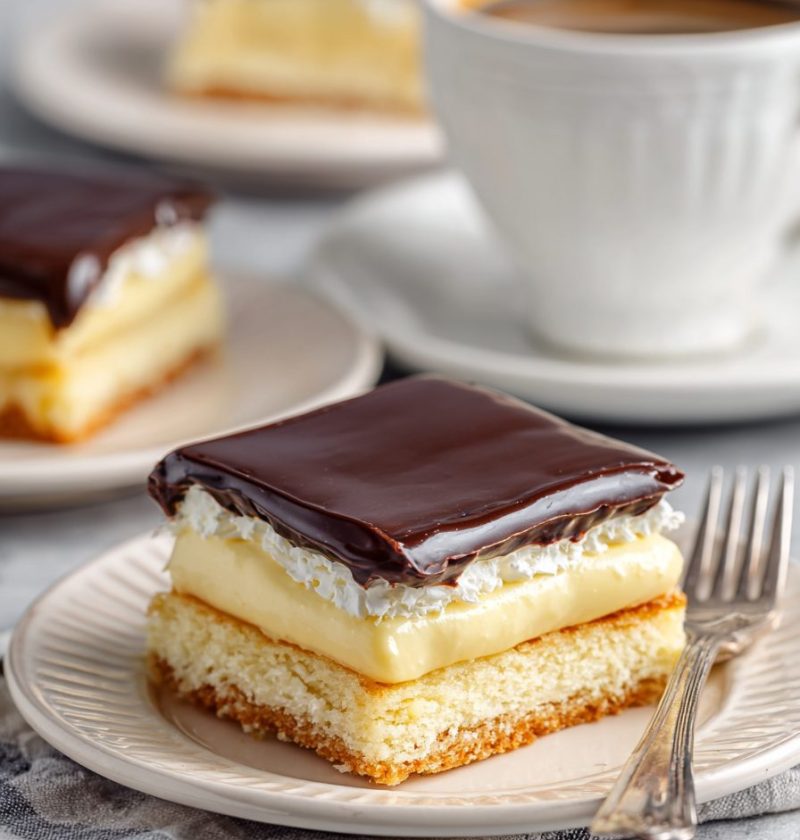
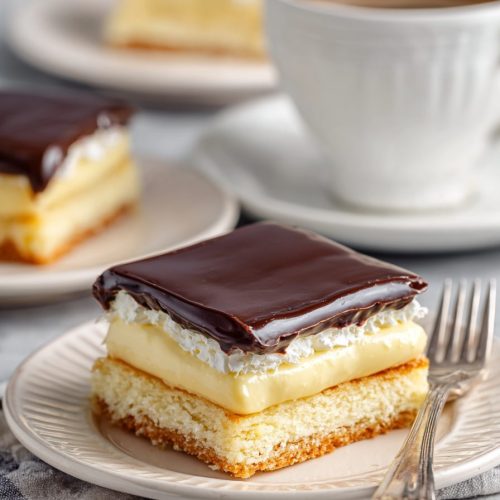
If you love the classic bakery dessert but don’t feel like fussing with cake layers, this Boston Cream Pie Bars Recipe gives you all that silky, custardy, chocolate-topped magic in an easy pan of bars that’s perfect for sharing.
Full Recipe Introduction
Boston cream pie has always felt a little fancy to me—like something you’d see in a glass case at an old-school diner or a special-occasion bakery in the city. Soft yellow cake, cool vanilla custard, and a glossy chocolate topping… it’s a simple idea, but when it works, it really works.
This Boston Cream Pie Bars Recipe takes everything we love about the classic and stacks it into a friendly, make-ahead dessert bar. You get:
- A tender yellow cake base
- A thick vanilla Pudding filling that tastes like pastry cream
- A smooth chocolate ganache topping that sets just enough to slice, but melts in your mouth
No fancy tools. No trying to level cake layers. No panic when the custard wants to ooze out the sides. Just one 9×13 pan, a little chill time, and that nostalgic Boston cream flavor in every bite.
I like to bring these Boston cream dessert bars to church potlucks, family birthdays, and those “bring a dessert” work events where you know the plates are going to sit out for a while. They hold up, they travel well, and people go back for seconds. According to Google Trends, searches for “easy dessert bars” jump up around holidays and big-game weekends—exactly the kind of moment when a pan of custard filled bars will disappear in a flash.
You can keep things quick with a cake mix and instant pudding, or lean into a more “from scratch” approach with homemade vanilla pudding filling and a richer yellow cake base. I’ll walk you through both along the way, so you can pick what fits your time and energy. Some nights we measure flour and egg yolks. Some nights we’re opening a box and calling it good. Both are allowed here.

Why You’ll Love This Boston Cream Pie Bars Recipe
- All the classic Boston cream flavor without the fuss – No stacking cake layers or worrying about them tipping over.
- Crowd-friendly bars – Easy to slice, serve, and pack for potluck dessert bars, bake sales, and school events.
- Semi-homemade or scratch—your call – Use a yellow cake mix and instant pudding for speed, or swap in homemade versions when you feel like baking therapy.
- Make-ahead dream – This layered dessert recipe needs chill time, so it’s perfect for prepping the day before you host.
- Firm enough to slice, soft enough to feel indulgent – The vanilla pudding filling sets into a custard-like layer that holds together but still tastes silky.
- Simple, familiar ingredients – Nothing wild or hard to find; most big U.S. grocery stores carry everything on this list.
- Customizable – Gluten-free mix, dark chocolate ganache, flavored pudding—you can tweak it to suit your people.
- Great for new bakers – Directions are straightforward, and the only “tricky” part is patience while it chills.
Ingredients
You’ll build these Boston cream treat bars in three layers: yellow cake base, vanilla pudding filling, and chocolate ganache topping.
I’ll list the “quick and easy” version first, then mention simple swaps if you’d like a more homemade feel.
For the yellow cake base
- 1 box (15.25 oz) yellow cake mix
- 1/2 cup (1 stick / 113 g) unsalted butter, melted and slightly cooled
- 2 large eggs, room temperature
- 1/2 cup whole milk (for extra moisture and tenderness)
- 1 teaspoon pure vanilla extract (boosts that classic bakery flavor)
Substitution notes:
- You can use a white cake mix or French vanilla cake mix. The flavor will still be lovely.
- For a lighter base, use 1/3 cup neutral oil (like canola or vegetable) instead of melted butter, but butter gives better flavor.
- For gluten-free Boston cream dessert bars, use a gluten-free yellow cake mix and follow the box directions, but aim for a thick batter so it forms a sturdy base.
For the vanilla pudding filling
- 2 boxes (3.4 oz each) instant vanilla pudding mix
- 2 1/2 cups cold whole milk
- 1 cup heavy cream or half-and-half (makes a richer, custard-like texture)
- 1 teaspoon pure vanilla extract
- Pinch of fine sea salt (brings out the vanilla flavor)
Substitution notes:
- You can use 2% milk, but the filling will be a bit looser. I don’t recommend skim milk here.
- If you prefer a more “true pastry cream” flavor, replace 1/2 cup of the milk with 1/2 cup sour cream or plain Greek yogurt for slight tang and extra body.
- Sugar-free instant pudding also works if you’re watching sugar; just note the texture can be a little firmer.
From-scratch pudding option (instead of instant pudding)
If you’d rather skip the boxes, use this instead of the instant pudding + milk:
- 4 cups whole milk
- 3/4 cup granulated sugar
- 6 large egg yolks
- 1/3 cup cornstarch
- 2 tablespoons unsalted butter
- 1 1/2 teaspoons vanilla extract
- Pinch of salt
(I’ll add quick directions for this in the Notes section.)
For the chocolate ganache topping
- 2 cups (12 oz) semisweet chocolate chips or chopped chocolate
- 1 cup heavy cream
- 1 tablespoon light corn syrup (optional, for shine and a slightly softer set)
- 1 teaspoon vanilla extract
- Pinch of salt
Substitution notes:
- Use dark chocolate chips if you like a deeper, less sweet topping, or milk chocolate if serving kids who like things sweeter.
- If you don’t have heavy cream, you can use 3/4 cup heavy cream + 1/4 cup whole milk; just chill the bars well so the ganache sets.
- Dairy-free? Use dairy-free chocolate and canned coconut milk (full fat) instead of cream.
Directions
You’ll build these custard filled bars in layers, with cooling and chilling along the way. Don’t rush the chill time; it’s what gives you clean slices.
1. Preheat and prep the pan
- Preheat your oven to 350°F (175°C).
- Lightly grease a 9×13-inch baking pan with butter or nonstick spray.
- Line the bottom with parchment paper, leaving a bit of overhang on the long sides. This makes it much easier to lift the bars out for clean cutting.
Tip: A metal pan bakes more evenly than glass. If using glass, your cake base may need an extra 2–3 minutes.
2. Mix the yellow cake base
- In a large bowl, add the yellow cake mix.
- Whisk in the melted butter, eggs, milk, and vanilla extract until the batter is smooth and thick, about 1–2 minutes.
You’re looking for a spreadable batter, not something runny. It should fall off a spatula in a thick ribbon.
3. Bake the cake layer
- Pour the batter into the prepared pan and spread it into an even layer with a spatula.
- Bake for 18–22 minutes, or until the top is lightly golden and a toothpick inserted in the center comes out clean or with a few moist crumbs.
Tip: Don’t overbake—the cake will be chilled, and slightly under-baking by a minute keeps it soft but sturdy.
- Let the cake cool completely in the pan on a wire rack. This can take about 45–60 minutes. You don’t want any warmth left when you add the filling, or it may loosen.
4. Make the vanilla pudding filling
- In a large mixing bowl, whisk together the instant vanilla pudding mixes, cold milk, and heavy cream (or half-and-half) for 1–2 minutes, until thick and smooth.
- Stir in the vanilla extract and a pinch of salt.
The pudding should be thicker than what you’d pour into a bowl—closer to a soft custard. If it seems loose, let it sit for 5 minutes and whisk again.
5. Layer the pudding over the cake
- Once the cake base is fully cool, pour the vanilla pudding filling over the cake.
- Spread it carefully into an even layer, making sure it reaches the corners without pulling up the cake.
Tip: Use an offset spatula if you have one. It makes smoothing the top easier and keeps the layers neat.
- Cover the pan tightly with plastic wrap, gently pressing it against the surface of the pudding to prevent a skin from forming.
- Refrigerate for at least 1 hour, or until the pudding layer is set and no longer jiggly in the center.
6. Make the chocolate ganache topping
- Place the chocolate chips (or chopped chocolate) in a medium heatproof bowl.
- In a small saucepan, heat the heavy cream over medium heat until it just begins to simmer around the edges. Don’t let it boil.
- Pour the hot cream over the chocolate. Add the corn syrup (if using), vanilla, and salt.
- Let sit for 3–4 minutes, then gently whisk from the center outward until the ganache is smooth and glossy.
If you see tiny bits of unmelted chocolate, you can warm the bowl over a pot of gently simmering water for 20–30 seconds and whisk again.
7. Spread the ganache and chill
-
Let the ganache cool for about 10–15 minutes, stirring occasionally, until it thickens slightly but is still pourable. You don’t want it hot or it may melt the pudding.
-
Remove the pan from the fridge and peel off the plastic wrap.
-
Pour the ganache over the pudding layer and gently tilt the pan or use a spatula to spread it into an even layer.
-
Refrigerate the bars for at least 3 hours, or until the ganache is set and the whole layered dessert is firm. For best results, chill overnight.
8. Slice and serve
- Once fully chilled, use a thin knife to loosen the edges, then lift the bars out of the pan using the parchment overhang.
- Cut into 16–24 bars with a sharp knife. Wipe the knife clean between cuts for the neatest layers.
Serve cold or slightly cool. You’ll see that beautiful yellow cake base, creamy vanilla pudding filling, and shiny chocolate ganache topping in each bite-sized square.
Servings & Timing
- Yield: About 16 large bars or up to 24 smaller bars
- Prep Time: 25–30 minutes (including mixing and layering)
- Bake Time: 18–22 minutes
- Chill Time: 4 hours minimum, preferably overnight
- Total Time: Around 5 hours, most of it hands-off
So yes, this Boston Cream Pie Bars Recipe isn’t “fast” in clock time, but the actual work is pretty relaxed. You mix, bake, cool, whisk, pour, and let the fridge do the rest.
Variations
If you’re like me, once you love a recipe, you start playing with it. Here are some fun twists:
- Chocolate-on-chocolate version – Use chocolate cake mix for the base and keep the vanilla pudding filling as-is for a double-chocolate Boston cream treat.
- Mocha ganache – Stir 1–2 teaspoons instant espresso powder into the hot cream before pouring it over the chocolate for a subtle coffee note.
- Gluten-free bars – Use your favorite gluten-free yellow cake mix and double-check that your pudding and chocolate are certified gluten-free.
- Lighter pudding layer – Use sugar-free pudding mix and 2% milk, and swap the heavy cream with extra milk (texture will be a bit softer).
- Funfetti twist – Fold 2–3 tablespoons of rainbow sprinkles into the cake batter before baking for birthday party bars.
- Strawberry layer – Before the ganache, add a thin layer of sliced fresh strawberries over the pudding for a spring or summer spin.
Storage & Reheating
Well, not much reheating here—this is very much a cold dessert—but storage matters.
How to store
- Cover the pan tightly with plastic wrap or store sliced bars in an airtight container.
- Keep the bars in the refrigerator for up to 4–5 days. The cake will slowly absorb some moisture from the filling, but they still taste great.
Freezing
- For longer storage, you can freeze individual bars.
- Place sliced bars on a baking sheet and freeze until firm, then wrap each one in plastic wrap and place in a freezer bag or container.
- Freeze for up to 2 months.
Thawing
- Thaw bars in the refrigerator overnight for best texture.
- If you’re in a hurry, you can let them sit at room temperature for 20–30 minutes, but don’t leave them out too long—remember, that vanilla pudding filling likes to stay cool.
Make-ahead tips
- This Boston Cream Pie Bars Recipe is ideal for making 1–2 days in advance.
- If you’re serving for a party, I suggest making them the day before and letting them chill overnight; the layers settle, firm up, and slice like a dream.
You can even bake the yellow cake base a day in advance, keep it covered at room temperature, and add the filling and ganache the morning of your event.
Notes
Here’s what I’ve learned after making these more times than I can count (my husband jokes that “someone” keeps volunteering dessert wherever we go):
- Chill time is non-negotiable. If you try to slice too soon, the pudding layer will squish out and the ganache may slide. Set a timer and walk away.
- Use cold ingredients for the pudding. Cold milk helps instant pudding thicken more quickly and set firmer. I like to chill my mixing bowl too if my kitchen’s warm.
- Don’t pour hot ganache on cool pudding. Let the ganache cool until just slightly warm. If it feels hot to the touch, it’s not ready.
- Cut smaller pieces than you think. These are rich. Little squares go a long way, especially at a big party table with lots of choices.
- Use good vanilla and chocolate. With such simple layers, flavor quality matters. I love Ghirardelli or Guittard chocolate chips and real vanilla extract (not imitation) for that classic bakery taste.
From-scratch pudding quick guide (if you want to skip instant):
- Heat 3 1/2 cups of the milk in a saucepan until steaming.
- In a bowl, whisk sugar, cornstarch, salt, remaining 1/2 cup milk, and egg yolks until smooth.
- Slowly whisk the hot milk into the egg mixture, then return everything to the pan.
- Cook over medium heat, whisking, until thick bubbles form and it coats the back of a spoon.
- Take off the heat, stir in butter and vanilla, then cool with plastic wrap pressed on the surface.
- Once cool and thick, spread over the cake base as you would the instant pudding filling.
It’s a little more work but adds that “bakery pastry cream” feel if you’re in the mood.
FAQs
Can I make this Boston Cream Pie Bars Recipe with homemade cake instead of a mix?
Yes. Use your favorite 9×13 yellow Cake Recipe, bake it as directed, then cool completely and continue with the pudding and ganache layers.
Do I have to use heavy cream in the ganache?
Heavy cream gives the smoothest, most stable chocolate ganache topping, but you can use full-fat canned coconut milk or a mix of cream and whole milk if needed.
My pudding layer is too soft and won’t set. What happened?
Most often, this happens if you used less pudding mix, more milk than called for, or low-fat milk. Next time, stick to whole milk and give the pudding a longer chill.
Can these bars sit out at room temperature for a party?
They’re fine at cool room temperature for about 1–2 hours, but because of the vanilla pudding filling, I like to return them to the fridge after that.
How can I cut clean slices without the ganache cracking?
Use a sharp knife, run it under hot water, dry it, and make each cut with a gentle, steady motion—clean and re-warm the knife between slices.
Can I halve this recipe?
Yes. Use a smaller box of cake mix or weigh out half, halve the rest of the ingredients, and bake in an 8×8 or 9×9 pan; keep an eye on bake time as it may change by a few minutes.
Can I make this without corn syrup in the ganache?
Absolutely. The corn syrup just adds shine and softness. Leave it out if you prefer, and your ganache will still taste wonderful.
Is there a way to make these a bit less sweet?
Use dark chocolate (60–70%) for the ganache, reduce added sugar if making pudding from scratch, and stick with a basic yellow cake base rather than “extra sweet” styles.
Conclusion
This Boston Cream Pie Bars Recipe takes a classic, beloved dessert and turns it into something that’s easier to share, easier to carry, and honestly, easier to pull off on a busy week. You still get that tender yellow cake base, silky vanilla pudding filling, and rich chocolate ganache topping—just stacked in a pan and ready for a crowd.
If you give these a try, I’d love to hear how they turn out and what little tweaks you make for your family. Leave a comment, share a photo, or, if you’re browsing around, check out some of my other easy dessert bars and layered dessert recipes for your next potluck.
Boston Cream Pie Bars
Ingredients
- 1 box (15.25 oz) yellow cake mix
- 1/2 cup unsalted butter melted and slightly cooled
- 2 large eggs room temperature
- 1/2 cup whole milk
- 1 teaspoon vanilla extract for cake base
- 2 boxes (3.4 oz each) instant vanilla pudding mix
- 2 1/2 cups cold whole milk for pudding filling
- 1 cup heavy cream or half-and-half for pudding filling
- 1 teaspoon vanilla extract for pudding filling
- pinch fine sea salt for pudding filling
- 2 cups (12 oz) semisweet chocolate chips or chopped chocolate
- 1 cup heavy cream for ganache
- 1 tablespoon light corn syrup optional, for shine and softer set
- 1 teaspoon vanilla extract for ganache
- pinch salt for ganache
Instructions
- Preheat your oven to 350°F (175°C). Lightly grease a 9×13-inch baking pan with butter or nonstick spray. Line the bottom with parchment paper, leaving an overhang on the long sides for easy lifting.
- In a large bowl, add the yellow cake mix. Whisk in the melted butter, eggs, 1/2 cup whole milk, and 1 teaspoon vanilla extract until the batter is smooth and thick, 1–2 minutes. It should be spreadable, not runny.1 box (15.25 oz) yellow cake mix, 1/2 cup unsalted butter, 2 large eggs, 1/2 cup whole milk, 1 teaspoon vanilla extract
- Pour the batter into the prepared pan and spread into an even layer. Bake for 18–22 minutes, or until lightly golden and a toothpick inserted in the center comes out clean or with a few moist crumbs. Cool completely in the pan on a wire rack, about 45–60 minutes.
- In a large mixing bowl, whisk together the instant vanilla pudding mixes, 2 1/2 cups cold whole milk, and 1 cup heavy cream or half-and-half for 1–2 minutes, until thick and smooth. Stir in 1 teaspoon vanilla extract and a pinch of fine sea salt. Let stand 5 minutes if it seems loose, then whisk again.2 boxes (3.4 oz each) instant vanilla pudding mix, 2 1/2 cups cold whole milk, 1 cup heavy cream or half-and-half, 1 teaspoon vanilla extract, pinch fine sea salt
- Once the cake base is completely cool, pour the vanilla pudding filling over the cake. Spread gently into an even layer, reaching all corners without pulling up the cake. Cover the pan tightly with plastic wrap, pressing it lightly against the pudding surface, and refrigerate for at least 1 hour, until the pudding is set and no longer jiggly in the center.
- Place the chocolate chips or chopped chocolate in a medium heatproof bowl. In a small saucepan, heat 1 cup heavy cream over medium heat until it just begins to simmer around the edges. Pour the hot cream over the chocolate. Add the light corn syrup (if using), 1 teaspoon vanilla extract, and a pinch of salt. Let sit 3–4 minutes, then whisk gently from the center outward until smooth and glossy.2 cups (12 oz) semisweet chocolate chips or chopped chocolate, 1 cup heavy cream, 1 tablespoon light corn syrup, 1 teaspoon vanilla extract, pinch salt
- Let the ganache cool for 10–15 minutes, stirring occasionally, until slightly thickened but still pourable and just warm, not hot. Remove the pan from the fridge and peel off the plastic wrap. Pour the ganache over the pudding layer and tilt the pan or use a spatula to spread it into an even layer.
- Refrigerate the bars for at least 3 hours, or preferably overnight, until the ganache is set and the dessert is firm enough to slice cleanly.
- Use a thin knife to loosen the edges, then lift the slab out using the parchment overhang. Cut into 16–24 bars with a sharp knife, wiping the blade clean between cuts for neat layers. Serve cold or slightly cool.