Would you like to save this?
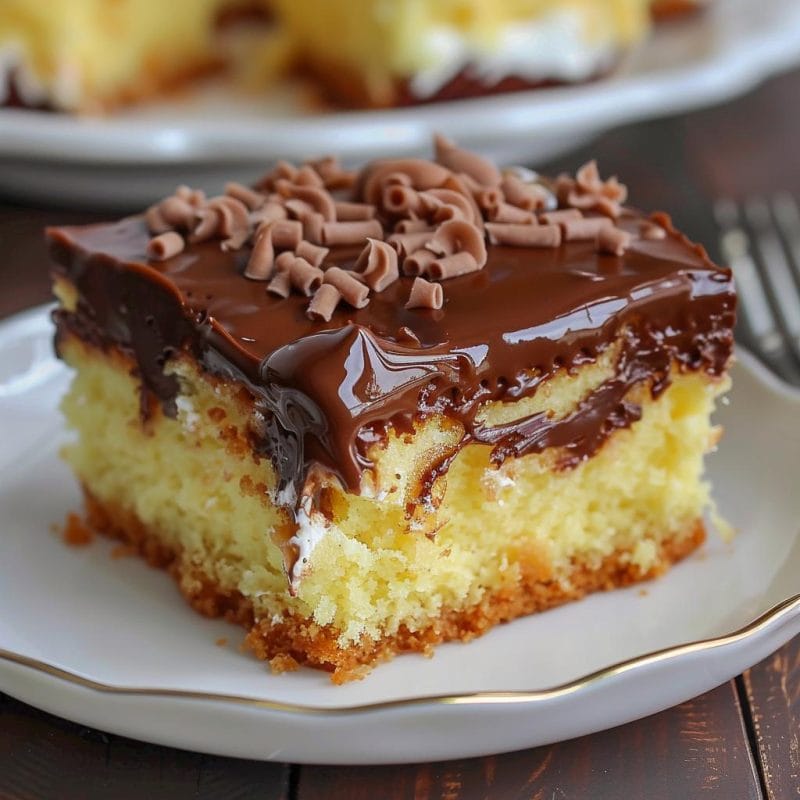
My first encounter with Boston Cream Poke Cake was at a friend’s birthday party. I was instantly captivated by the idea of a poke cake – a cake with holes poked into it, allowing it to soak up a delicious filling. The combination of the vanilla pudding filling and the chocolate frosting was reminiscent of the classic Boston Cream Pie, but it was so much easier to make and serve. I knew I had to recreate this at home, and since then, it has become a favorite dessert in my household.
Ingredients
1 box Yellow Cake Mix (plus ingredients needed as per box instructions, usually eggs, oil, and water)
2 small boxes (3.4 oz each) Instant Vanilla Pudding Mix
4 cups Milk
1 container Chocolate Frosting
Step-by-Step Instructions
Step 1: Prepare the Cake
Preheat the Oven:
Preheat your oven to the temperature specified on the box of yellow cake mix, usually 350°F (175°C).
Mix the Cake Batter:
In a large mixing bowl, prepare the yellow cake batter according to the instructions on the box. This typically involves combining the cake mix with eggs, oil, and water. Use an electric mixer or whisk to ensure the batter is smooth and well combined.
Bake the Cake:
Pour the cake batter into a 13×9-inch baking pan that has been greased or lined with parchment paper. Bake according to the time specified on the cake mix box, usually 25-30 minutes, or until a toothpick inserted into the center comes out clean.
Cool the Cake:
Allow the cake to cool in the pan on a wire rack until it is just slightly warm to the touch. This cooling step is important as it helps the cake to firm up a bit before you poke holes in it.
Step 2: Prepare the Pudding
Mix the Pudding:
In a medium mixing bowl, combine the 2 small boxes of instant vanilla pudding mix with 4 cups of cold milk. Use a whisk to mix until the pudding is smooth and begins to thicken, which should take about 2-3 minutes.
Step 3: Assemble the Poke Cake
Poke Holes in the Cake:
Using the handle of a wooden spoon or another similarly sized object, poke holes evenly across the entire surface of the cake. The holes should be about 1 inch apart and should reach down to the bottom of the cake. This allows the pudding to seep into the cake, creating a moist and flavorful dessert.
Pour the Pudding:
Pour the prepared vanilla pudding over the cake, making sure to fill each hole. Use a spatula to spread the pudding evenly across the surface of the cake, ensuring it gets down into the holes and covers the entire top of the cake.
Refrigerate the Cake:
Place the cake in the refrigerator for several hours, or preferably overnight. This allows the pudding to set and the flavors to meld together.
Step 4: Add the Chocolate Frosting
Prepare the Frosting:
Open the container of chocolate frosting and remove the foil seal. Place the container in the microwave and heat for 15 seconds. Stir the frosting and repeat this process until the frosting is smooth and pourable. Be careful not to overheat the frosting, as it should be just warm enough to spread easily.
Frost the Cake:
Pour the warmed frosting over the top of the chilled pudding layer. Use a spatula to spread the frosting evenly, covering the entire surface of the cake. The frosting should form a smooth, glossy layer over the pudding.
Chill the Cake:
Return the cake to the refrigerator and chill for at least several more hours, or until the frosting has set. This ensures that the cake is fully chilled and ready to serve.
Variations and Substitutions
Flavor Variations:
You can experiment with different pudding flavors, such as chocolate or butterscotch, for a unique twist on the traditional recipe.
Lighter Version:
For a lighter version of this dessert, use sugar-free pudding mix and light or fat-free whipped topping instead of the chocolate frosting.
Toppings:
Add a sprinkle of chopped nuts, chocolate chips, or toasted coconut on top of the frosting for added texture and flavor.
Homemade Components:
If you prefer, you can make homemade vanilla pudding and chocolate ganache instead of using instant pudding mix and store-bought frosting. This will add a bit more effort but can enhance the flavor.
Conclusion
Boston Cream Poke Cake is a delightful dessert that brings the classic flavors of Boston Cream Pie into an easy-to-make, crowd-pleasing cake. The combination of moist yellow cake, creamy vanilla pudding, and rich chocolate frosting creates a dessert that’s both decadent and satisfying. Perfect for any occasion, this cake is sure to impress your family and friends.
What makes this recipe particularly appealing is its simplicity and versatility. With basic ingredients and straightforward steps, you can create a dessert that looks and tastes like it took hours to prepare. Plus, the ability to customize the flavors and toppings means you can adapt the recipe to suit your personal preferences.
So, next time you’re in the mood for a delicious dessert, give this Boston Cream Poke Cake a try. It’s sure to become a favorite in your home, just as it has in mine. Enjoy the process of making it and, most importantly, savor every delicious bite!


