Would you like to save this?
Get ready to cultivate your own wild yeast with this easy homemade sourdough starter recipe—just flour, water, and a bit of patience for a healthy fermentation process that sets the foundation for irresistibly tangy loaves.
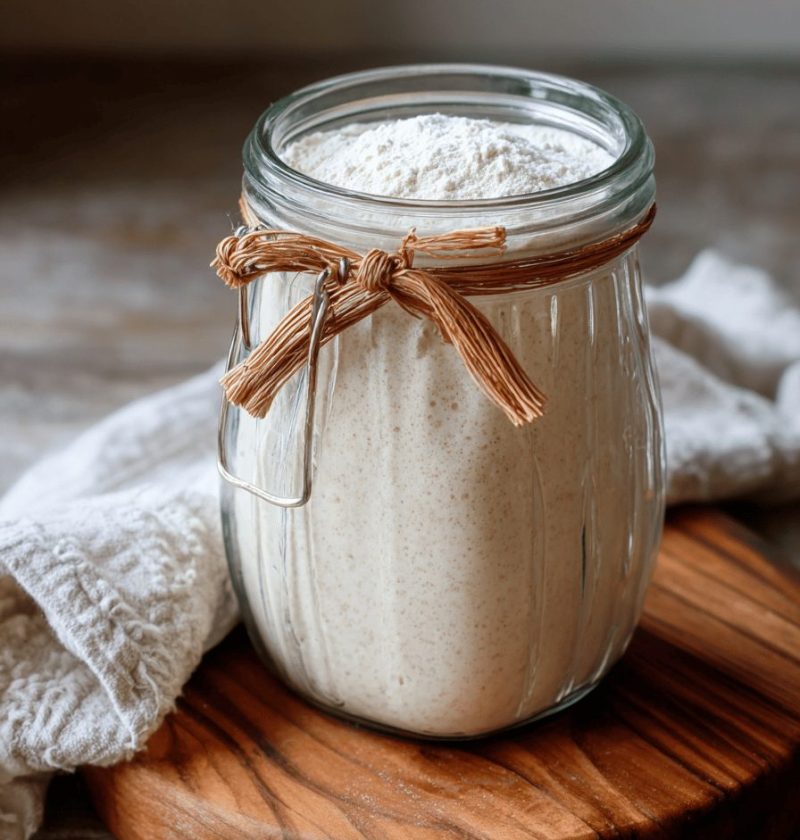
It’s incredible how a simple mix of flour and water can turn into a bubbling, tangy base for everything from crusty boules to fluffy Pancakes. A sourdough starter is a living culture of wild yeast and friendly bacteria—fermentation in action. I call it my little kitchen pet. You feed it daily, and it rewards you with complex flavors you just can’t get from commercial yeast. This homemade approach makes your bake not only unique but also healthier, thanks to the slow rise that breaks down phytic acid in the grain.
You know what? According to a King Arthur Flour survey, bakers who cultivate their own starters report 30% more depth in flavor compared to store-bought mixes. As a 50-year-old cook, I’m still amazed when I see those bubbles forming on day three. It reminds me of the first loaf I baked back in 2005—a rustic boule with a crackling crust that stole the show at our family picnic. Whether you live in a dry climate or a humid one, these steps will help you cultivate a robust culture that thrives.
Why You’ll Love This Sourdough Starter Recipe
- Simple ingredients you always have on hand—no fancy gear needed
- Hands-on fermentation process for a sense of accomplishment
- Gently breaks down grains, making Bread easier to digest
- Wild yeast cultivation means unique, tangy flavor every time
- Adaptable feeding schedule fits busy or relaxed routines
- Freezes well—share your culture or press pause for a vacation
- Perfect base for loaves, pancakes, waffles, and even cakes
- Budget-friendly compared to repeated store-bought yeast purchases
Ingredients You Need for This Sourdough Starter Recipe
- 1 cup (120 g) unbleached all-purpose flour (or a 50/50 blend with whole wheat for extra nutrients)
- 1 cup (120 g) whole wheat flour (optional swap for a heartier taste)
- 1/2 cup (120 ml) filtered or spring water, lukewarm (around 70 °F—avoid chlorinated tap water)
- 1 clean quart-sized glass jar (Mason jars work beautifully and let you watch the bubbles form)
- A kitchen scale (even a basic model helps you measure consistently)
- A rubber band or piece of tape to mark your starter’s growth
Tip: Organic flour often yields more vigorous fermentation since it retains more of the grain’s natural oils.

Directions
- Day 1: Combine ½ cup all-purpose flour and ½ cup whole wheat flour with ½ cup water in your jar. Stir briskly—no dry clumps. Mark the level with a rubber band.
- Day 2: Tiny bubbles may peek through. Don’t worry if you don’t see them yet—wild yeast can be shy. Discard half the starter (about ½ cup) and feed with ¼ cup each flour and water. Stir well.
- Days 3–5: Twice daily, discard half and feed with ¼ cup flour + ¼ cup water. Expect consistent bubbling within 4–6 hours—a sign your culture is gaining strength.
- Day 5: Your starter should now double in size within 6–8 hours of feeding. It’ll smell tangy, like yogurt or mild vinegar. If it’s not rising, keep feeding—cooler kitchens just take longer.
- Day 6: Perform the float test—drop a teaspoon of starter into lukewarm water. If it floats, it’s ready for baking. If it sinks, feed again and test after the next rise.
- Maintenance: Once established, switch to once-daily feedings or stash in the fridge with a weekly refresh. For weekend baking, pull from fridge the day before, discard half, feed, and let sit at room temp.
- Pro Tip: Using a clear jar helps you spot uneven fermentation. If a thin layer of dark liquid (“hoochâ€) forms on top, it’s just your starter saying it’s hungry—pour it off or stir it back in for extra tang.
Servings & Timing
Yield: about 1 cup of starter (enough to bake two 1-lb loaves)
Prep Time: 5 minutes per feeding
Fermentation Time: 5–7 days to reach full strength
Total Time: Approximately 5–7 days (plus 10–15 minutes of daily care)
Variations
- Rye Infusion: Swap half the flours for rye to boost activity and add a nutty aroma.
- Gluten-Free: Use brown rice and sorghum flour—expect a looser texture and adjust water slightly.
- Whole-Grain Bold: Go 100% whole wheat for a denser, earthier culture.
- Fruit Yeast Water: Replace water with homemade yeast water (from apple or grape) for extra lift.
- Quick-Start Boost: Add a teaspoon of active dry yeast on day one—still fermentation-driven but with a nudge.
Storage & Reheating
Refrigerator: Keep your starter chilled in a sealed jar and feed weekly; it stays happy for months.
Freezer: Portion ½ cup into a freezer bag, squeeze out air, and freeze—thaw in fridge and feed twice at room temp before baking.
Make-Ahead: For busy weeks, feed extra on a Friday, refrigerate, then refresh 12 hours before you plan to bake. No rush—your starter’s a hardy little companion.
Notes
During testing, I learned that room temperature really shifts the timeline—my starter peaks faster in summer. If you spot a greyish hooch layer, it signals hunger but is harmless. Feeding more often or trimming the initial feed quantities can balance acidity. My favorite jar is an old Weck—wide mouth, sturdy glass, and it feels like a nod to traditional baking.
FAQs
Q: My starter smells like nail polish remover. Is it bad?
A: That acetone scent means it’s super hungry—discard half, feed more often, and give it a warmer spot.
Q: Why isn’t my starter bubbling on day 3?
A: Patience pays off. Cooler kitchens or low-activity flours can take up to a week—just keep feeding.
Q: Can I use tap water?
A: If your tap water’s chlorinated, let it sit out overnight or use filtered water—chlorine can slow fermentation.
Q: How often should I feed once it’s mature?
A: At room temp, feed daily; in the fridge, once a week keeps it healthy but low-key.
Q: What’s the best flour for wild yeast?
A: Whole grain flours like rye or whole wheat have more nutrients, so they often create a more active starter.
Q: Can I bake with the starter before day 7?
A: You’ll get some rise and flavor, but for reliable leavening, wait until the float test passes—usually by day 5 or 6.
Conclusion
Creating your own sourdough starter recipe is part science, part art, and all heart. Once you nurture that bubbly culture, you open the door to endless baking adventures—from crusty loaves to tender crumpets. Ready to see what your starter can do? Give it a whirl, leave a comment with your results, and explore more tangy tales in my posts on sourdough Bread and fermented favorites. Happy cultivating!
Sourdough Starter Recipe
Get ready to cultivate your own wild yeast with this easy homemade sourdough starter recipe—just flour, water, and a bit of patience for a healthy fermentation process that sets the foundation for irresistibly tangy loaves.
- 1 cup (120 g) unbleached all-purpose flour (or a 50/50 blend with whole wheat for extra nutrients)
- 1 cup (120 g) whole wheat flour (optional swap for a heartier taste)
- 1/2 cup (120 ml) filtered or spring water (lukewarm (around 70 °F—avoid chlorinated tap water))
- 1 clean quart-sized glass jar Mason jars (work beautifully and let you watch the bubbles form)
- 1 rubber band or piece of tape to mark your starter’s growth
- Combine ½ cup all-purpose flour and ½ cup whole wheat flour with ½ cup water in your jar. Stir briskly—no dry clumps. Mark the level with a rubber band.
- Tiny bubbles may peek through. Don’t worry if you don’t see them yet—wild yeast can be shy. Discard half the starter (about ½ cup) and feed with ¼ cup each flour and water. Stir well.
- Twice daily, discard half and feed with ¼ cup flour + ¼ cup water. Expect consistent bubbling within 4–6 hours—a sign your culture is gaining strength.
- Your starter should now double in size within 6–8 hours of feeding. It’ll smell tangy, like yogurt or mild vinegar. If it’s not rising, keep feeding—cooler kitchens just take longer.
- Perform the float test—drop a teaspoon of starter into lukewarm water. If it floats, it’s ready for baking. If it sinks, feed again and test after the next rise.
- Once established, switch to once-daily feedings or stash in the fridge with a weekly refresh. For weekend baking, pull from fridge the day before, discard half, feed, and let sit at room temp.
- Using a clear jar helps you spot uneven fermentation. If a thin layer of dark liquid (“hoochâ€) forms on top, it’s just your starter saying it’s hungry—pour it off or stir it back in for extra tang.
During testing, I learned that room temperature really shifts the timeline—my starter peaks faster in summer. If you spot a greyish hooch layer, it signals hunger but is harmless. Feeding more often or trimming the initial feed quantities can balance acidity. My favorite jar is an old Weck—wide mouth, sturdy glass, and it feels like a nod to traditional baking.