Would you like to save this?
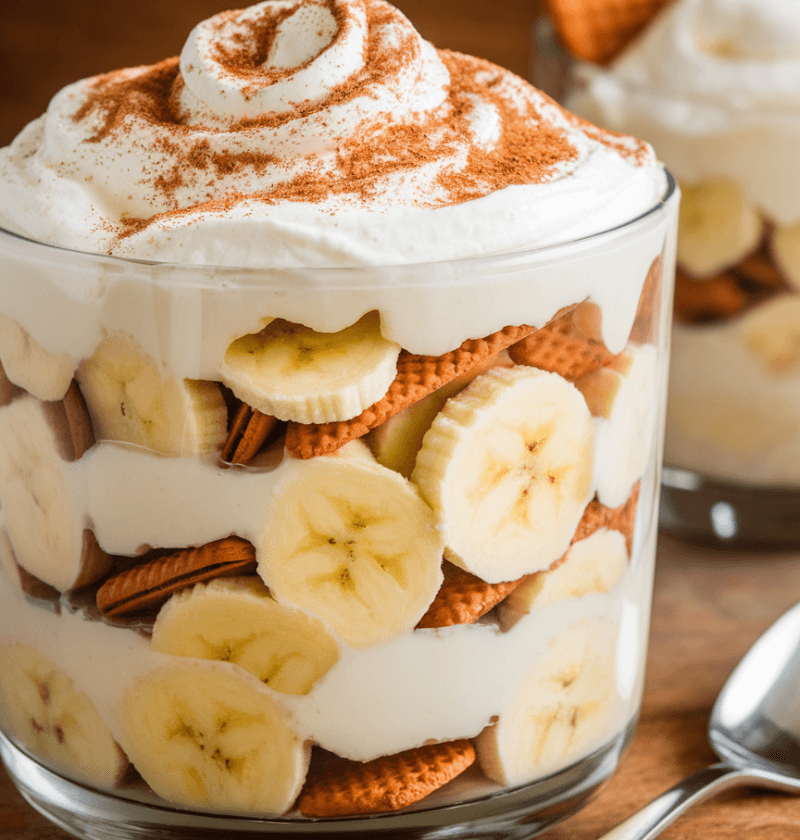
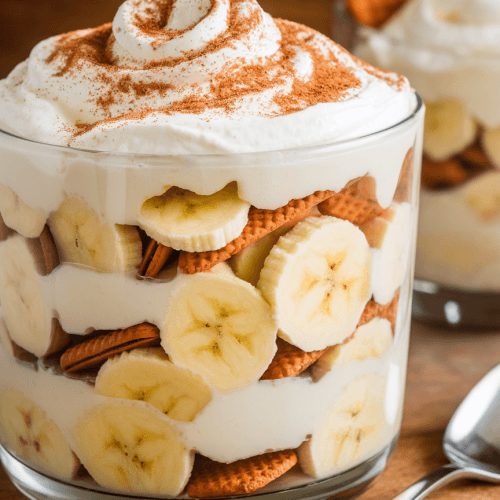
I’ve been whipping up this family-favorite for decades, and honestly, it’s hands-down The Best Banana Pudding Ever—you’ll be hooked from the first creamy bite. With layers of ripe bananas, silky pudding, and crunchy cookies, this delicious dessert never fails to put a smile on every face at the table.
Why You’ll Love This Recipe
• No baking required – just mix, layer, chill, and serve.
• Ready in under 20 minutes of hands-on time.
• Crowd-pleasing homemade recipe that feels gourmet but is incredibly simple.
• Luscious creamy texture balanced by crisp vanilla wafers.
• Perfect for summer picnics, potlucks, or cozy family dinners.
• Easily adaptable for dairy-free or vegan diets.
• Make-ahead friendly—prep in the morning and relax until dessert time.
• Kid-approved and nostalgia-packed, evoking childhood memories for everyone.
Ingredients
• 4 cups whole milk (or use almond milk for a lighter creaminess)
• 1 cup heavy cream (or coconut cream for a dairy-free twist)
• 1 cup granulated sugar
• ½ cup cornstarch
• 4 large egg yolks (room temperature)
• 2 teaspoons pure vanilla extract (look for Nielsen-Massey)
• Pinch of salt (to enhance flavors)
• 5–6 ripe bananas, sliced (firm yet sweet)
• 1 (12-oz) box vanilla wafers (Nilla wafers or Marie biscuits)
• Optional garnish: whipped cream, banana slices, or a sprinkle of cinnamon

Directions
1. In a medium saucepan, whisk together sugar, cornstarch, and salt. Add 3 cups of milk and stir until the mixture is smooth—no lumps allowed.
2. Over medium heat, cook the milk mixture, stirring constantly, until it thickens and just starts to bubble (about 6–8 minutes). You’ll know it’s ready when it coats the back of a spoon.
3. In a separate bowl, whisk the egg yolks with the remaining 1 cup of milk. Slowly drizzle about half a cup of the hot pudding into the yolks while whisking vigorously—this tempers the eggs and prevents scrambling.
4. Pour the egg yolk mixture back into the saucepan, whisking constantly for another 2 minutes. Remove from heat, then stir in vanilla extract and heavy cream for that irresistible creamy texture.
5. Grab a 9×13-inch dish. Lay a single layer of vanilla wafers on the bottom—close together but not overcrowded.
6. Top the wafers with half of the banana slices, followed by half of the pudding. Gently spread to cover evenly.
7. Repeat: a second layer of wafers, banana slices, and finish with the rest of the pudding. Smooth the top with an offset spatula.
8. Cover with plastic wrap—pressing it directly onto the surface to prevent a skin from forming—and chill in the fridge for at least 2 hours (overnight is even better).
9. Just before serving, add a dollop of whipped cream or extra banana slices on top for garnish. Dig in and enjoy!
Servings & Timing
• Makes 8–10 servings
• Prep Time: 15 minutes
• Chill Time: 2 hours (or overnight)
• Total Time: about 2 hours 15 minutes (mostly hands-off!)
Variations
• Salted Caramel Swirl: Drizzle caramel sauce between layers for a sweet-salty kick.
• Chocolate Banana Pudding: Add ½ cup cocoa powder to the pudding mix for a rich twist.
• Vegan Friendly: Swap dairy for coconut milk/cream and use vegan custard powder.
• Peanut Butter Cup Pudding: Scatter chopped mini peanut butter cups on each layer.
• Berry Fusion: Add a layer of fresh strawberries or raspberries for color and tang.
Storage & Reheating
Store leftover banana pudding in an airtight container in the refrigerator for up to 3 days. The crispy wafers will soften over time, turning into a delightful Cake-like layer. There’s no reheating needed—just grab a spoon and dive back in.
FAQs
Q: Can I use instant pudding mix instead of making it from scratch?
A: Sure—you’ll save time, but homemade pudding yields that unbeatable creamy texture and natural flavor.
Q: My bananas turned brown—still okay to serve?
A: It happens! A quick dip in lemon juice keeps slices bright, but a little browning won’t hurt the taste.
Q: How can I prevent a skin from forming on top of the pudding?
A: Press plastic wrap directly onto the pudding surface right after cooking; that barrier stops the skin.
Q: Can I freeze leftover banana pudding?
A: I don’t recommend it—freezing changes the texture of both the bananas and the custard.
Q: Is there a gluten-free version?
A: Yes—swap vanilla wafers for gluten-free cookies or crushed graham crackers.
Q: My pudding turned out too thin—what went wrong?
A: Likely under-cooked or not enough cornstarch; cook a bit longer until it coats a spoon.
Q: Can I make this in individual jars?
A: Absolutely—just layer in small mason jars for portable, party-ready desserts.
Conclusion
This recipe for The Best Banana Pudding Ever brings together the most comforting, creamy layers of banana pudding goodness in a homemade recipe that’s bound to be your new go-to delicious dessert. From its dreamy texture to the sweet nostalgia, every spoonful feels like a warm hug. Give it a whirl, then swing back here and let me know how it turned out—or share your own creative twists!
The Best Banana Pudding Ever
Ingredients
- 4 cups whole milk
- 1 cup heavy cream
- 1 cup granulated sugar
- ½ cup cornstarch
- 4 large egg yolks room temperature
- 2 teaspoons vanilla extract pure
- 1 pinch salt
- 5 to 6 ripe bananas, sliced
- 12 oz vanilla wafers
Instructions
- Whisk sugar, cornstarch, and salt in a saucepan; stir in 3 cups milk until smooth.
- Heat over medium, stirring constantly, until mixture bubbles and coats a spoon.
- Whisk yolks with remaining milk, then slowly whisk hot pudding into yolks.
- Return mixture to pan, cook 2 more minutes, then remove from heat and stir in vanilla and cream.
- Arrange wafers in dish, top with banana slices and half the custard; repeat layers.
- Cover surface with plastic wrap and refrigerate at least 2 hours before serving.
- Top with whipped cream or extra banana slices for a pretty finish.
Notes
Nutrition